Why Rainbow Chrome Wraps Are Twice as Hard to Install

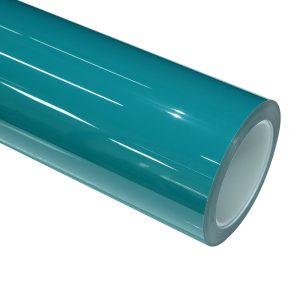
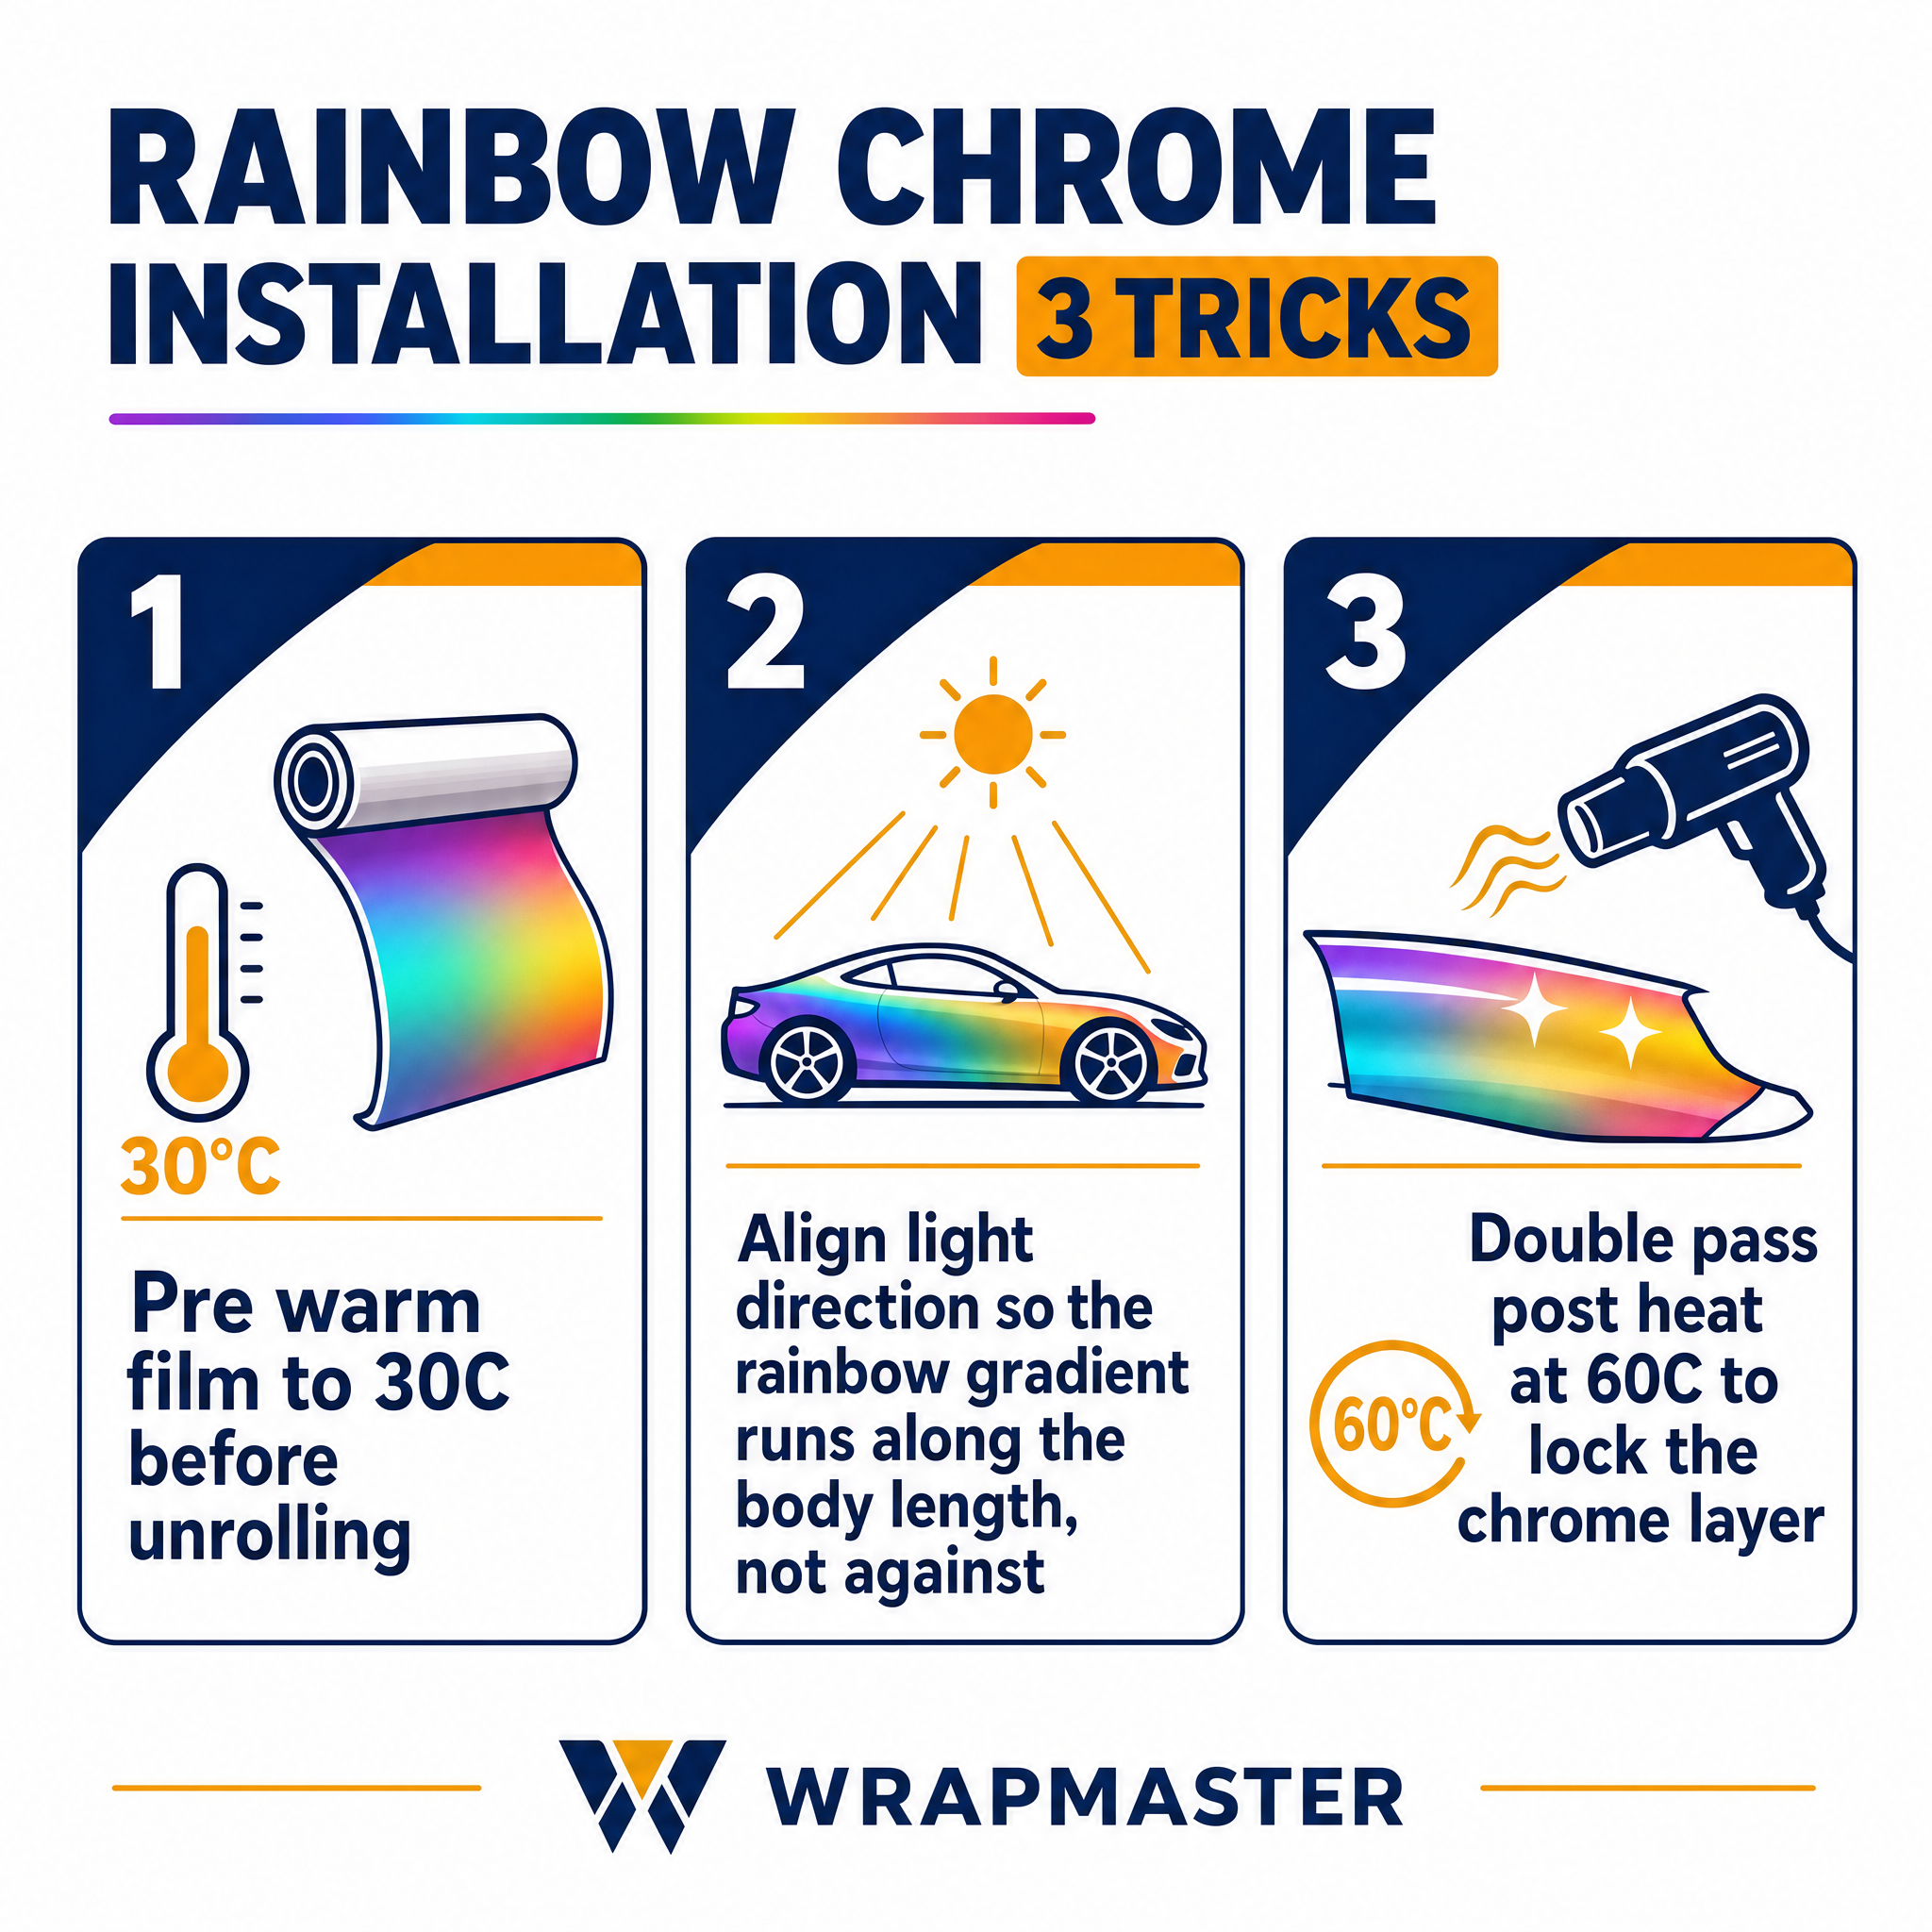
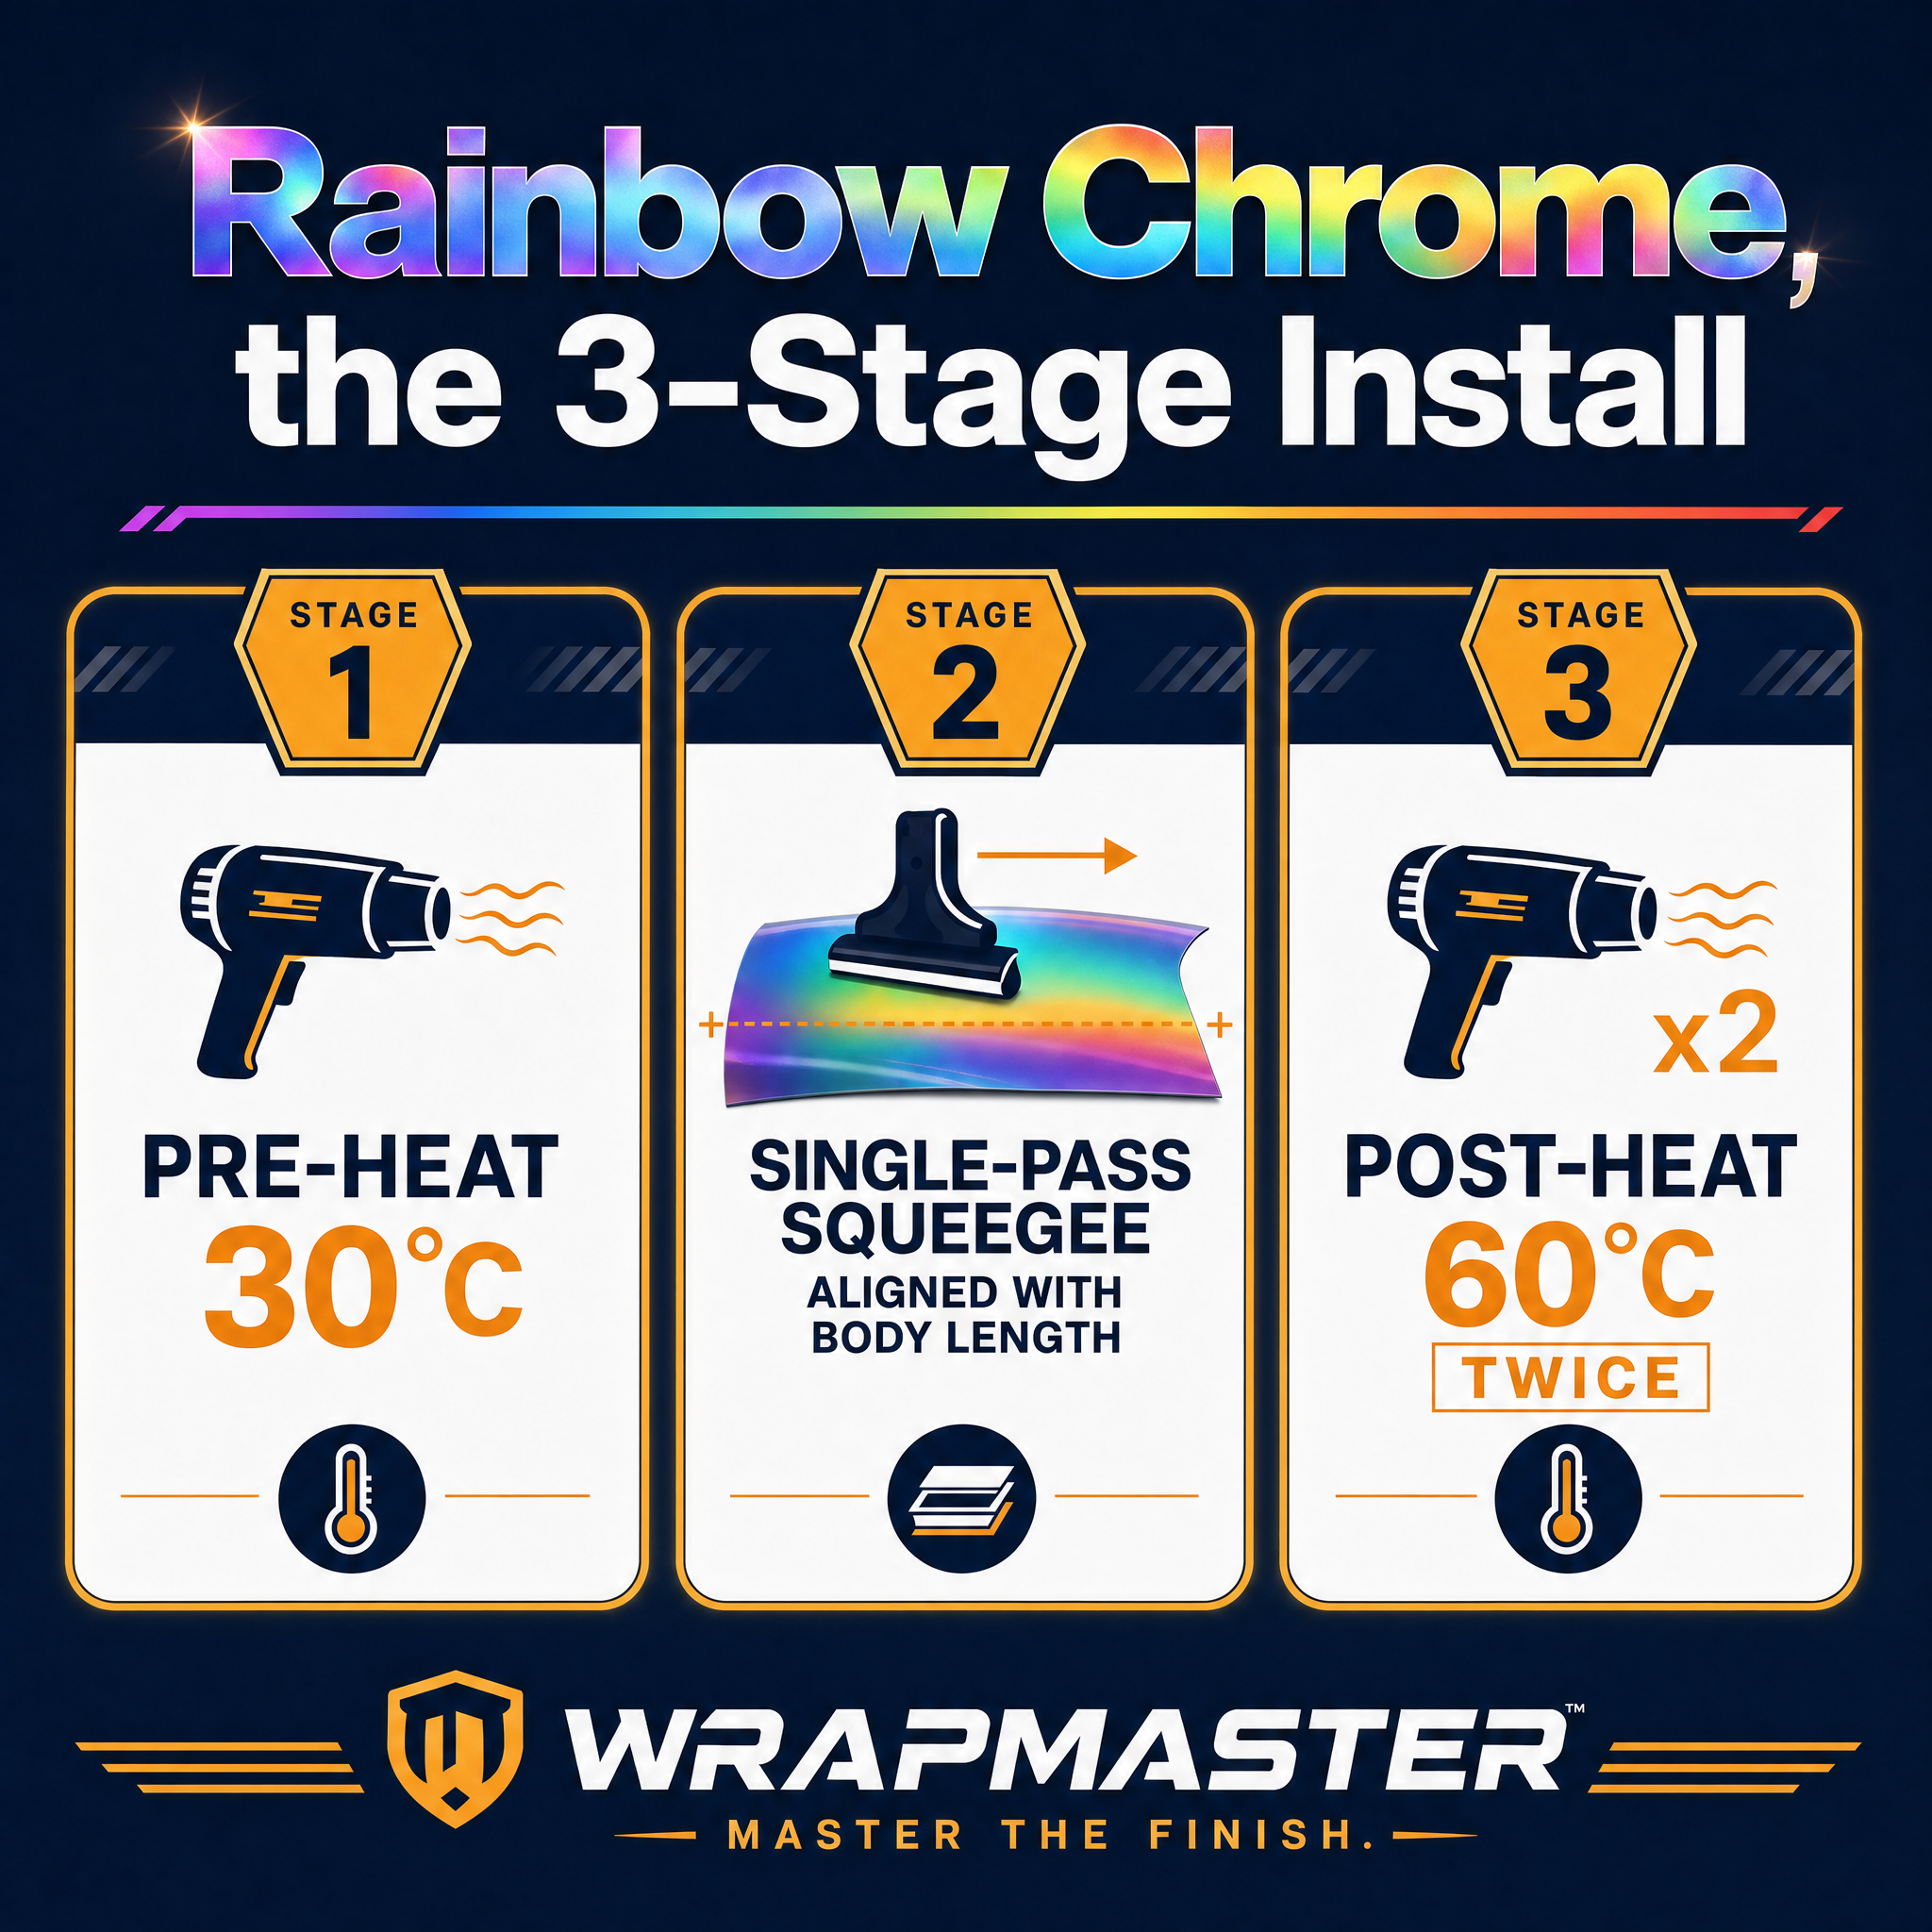
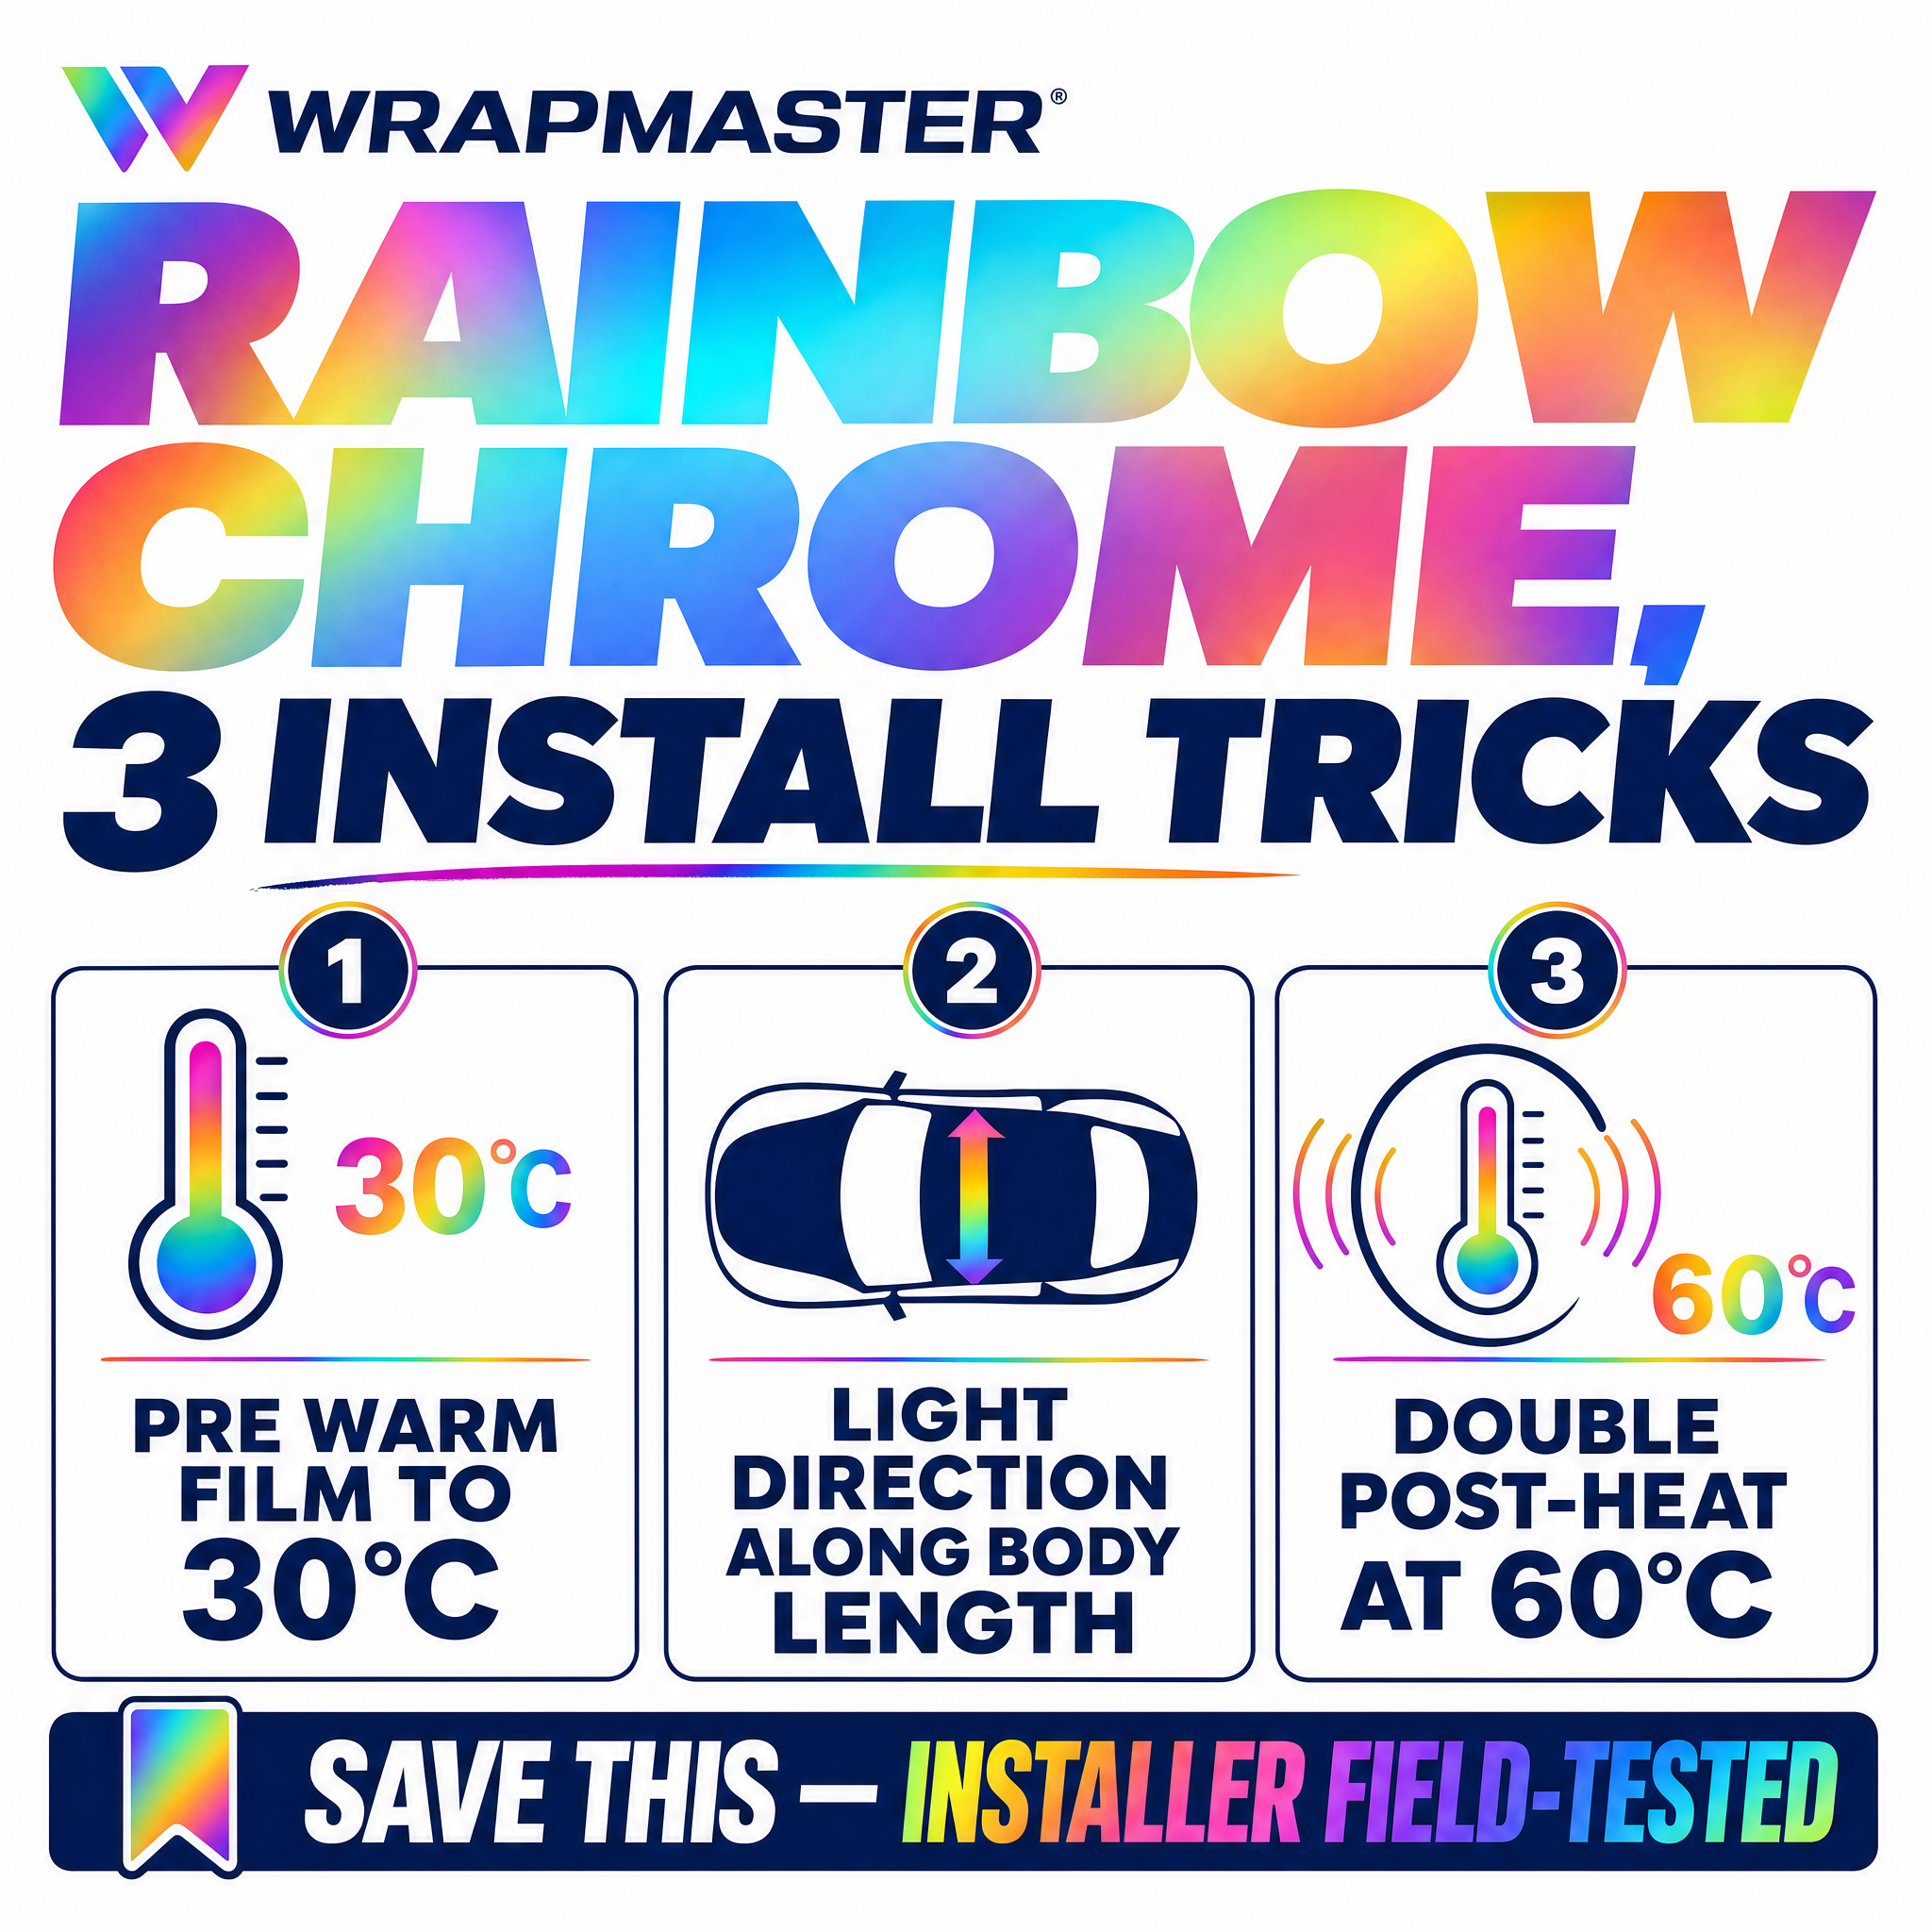
The short answer. Rainbow chrome wraps crack at curves more easily than regular mirror chrome because the rainbow holographic pattern is created by an additional optical interference layer that does not stretch as well as the metallised mirror base. The 3 install tricks that make rainbow chrome work, one, pre warm the panel to 30°C minimum before laying film, two, lay the film with the light direction running along the panel’s long axis (not against it), three, double post heat every curve at 90°C for 30 seconds twice. Our WM24 Rainbow Chrome Wrap range is the holographic chrome tier built for show car and statement builds.

Your installer can handle regular mirror chrome. The first rainbow chrome job, the film cracked at three different points on the fender. The rainbow shift died at the cracks. The customer was paying $5,000 for a statement wrap and now half the fender looks broken.

Rainbow chrome is the highest difficulty install in vinyl wrapping. It is roughly twice as hard as regular mirror chrome, which is already the hardest material in the category. Most installers refuse to take rainbow jobs after the first failure. The film is too expensive to keep practicing on, and the customers who want rainbow chrome have premium budgets and zero tolerance for visible install errors.

The good news, rainbow chrome is installable cleanly when you understand the three things that make it different from regular chrome. The rest of this article walks through them, and points to our WM24 Rainbow Chrome Wrap range.

If you have not read our regular chrome install article first, read that one before this one. The fundamentals are the same. The rainbow specifics build on them.

Why Rainbow Chrome Is Harder Than Mirror Chrome

Regular mirror chrome is a stack of four layers, clear topcoat, metallised mirror, carrier film, and adhesive. The metallised mirror is the layer that catches and reflects light to create the mirror finish.

Rainbow chrome adds a fifth layer, a holographic optical interference layer between the topcoat and the metallised mirror. This layer is what creates the colour shift effect across the surface as light hits at different angles. It is what makes rainbow chrome look like an oil slick or a soap bubble across the panel.

The problem, the holographic layer does not stretch like the mirror layer beneath it. Stretch rainbow chrome too far and the holographic layer cracks first, leaving a fine white line where the rainbow shift dies. The mirror layer below might still be intact, but the rainbow effect is broken at the crack.

Three things make rainbow chrome cracks worse than regular chrome cracks.

The cracks are more visible. Regular chrome cracks show as fine white lines on a uniform mirror surface. Rainbow chrome cracks show as dead spots in the colour shift, where the rainbow effect stops. Even small cracks are dramatic visual flaws.

The film is thicker overall. Adding the holographic layer pushes total film thickness to 150 to 180 microns, versus 120 to 150 microns for regular chrome. The thicker film resists stretch and rebounds more.

The film is more temperature sensitive. The holographic layer dulls at temperatures above 110°C, lower than the 120°C dulling threshold of regular mirror chrome. You have less heat headroom during install.
Why Rainbow Chrome Wraps Are Twice as Hard to Install chemistry graphic

The 3 Install Tricks That Make Rainbow Chrome Work

Trick 1, Pre Warm the Panel to 30°C Minimum

Regular mirror chrome installs successfully at panel temperatures of 18 to 25°C. Rainbow chrome does not. The holographic layer needs more thermal energy to stretch without cracking.

The rule, panel surface temperature must hit 30°C minimum before you start laying rainbow chrome. Confirm with an IR thermometer, do not guess by feel.

In cold workshops or winter installs, this means pre warming the panel with a heat gun set to low for 60 seconds, or using a panel warming light for 5 to 10 minutes. The film also needs to be pre warmed (kept in a warm room for at least 30 minutes before unwrapping the roll).

Cold panel rainbow chrome installs fail at the first compound curve. Every time.

Trick 2, Lay the Film With Light Direction, Not Against It

This is the trick that no one teaches. Rainbow chrome’s holographic layer has a directional orientation. The optical interference pattern lies in a specific axis across the film width. When you stretch the film, stretching with the optical axis is much more forgiving than stretching across it.

The rule, lay the rainbow chrome with the long axis of the panel running parallel to the roll’s length, not perpendicular.

What this means in practice. On a hood, run the film front to back, not side to side. On a fender, run the film parallel to the panel’s longest dimension. If you have to splice, splice along the directional axis, not across it.

Pay attention to the holographic shift direction visible on the film roll. The shift moves along the axis you should be installing parallel to. Always.

Trick 3, Double Post Heat Every Curve

Regular mirror chrome calls for one post heat pass at 90°C for 30 seconds on every curve. Rainbow chrome calls for two.

The rule, post heat each curve at 90°C for 30 seconds, let it cool for 60 seconds, then post heat the same curve at 90°C for another 30 seconds.

This double post heat locks the holographic layer into the stretched position permanently. Single post heat lets the holographic layer’s memory partially recover, which over 30 days lifts the film at the curve.

The double post heat takes 90 extra seconds per curve. A full car has 20 to 30 curves. That is 30 to 45 extra minutes per install. The trade off is rainbow chrome that survives the customer’s first year without curve lift.

Which Rainbow Chrome In Our Range For Which Build

Our WM24 Rainbow Chrome Wrap range carries the holographic chrome tier built for statement builds. Pick by the dominant colour shift the customer wants.

Browse the current lineup at the WM24 Rainbow Chrome category page. The range typically covers a spectrum of holographic shifts.

Customer brief Best match
Full body show car, maximum impact Wide spectrum rainbow chrome, primary shift purple to gold or green to red
Accent panels (hood, roof) on a luxury car Cool tone rainbow shift, blue to purple, sophisticated
Statement supercar build, supercar trim High contrast rainbow, gold to silver, premium
Boutique tuner full body Wide spectrum rainbow chrome, maximum colour range

Rainbow chrome is rarely the right choice for a daily driver. The film catches more dust than regular chrome (the holographic layer adds optical complexity that shows surface contamination), and the maintenance is intensive. Best for weekend cars and show cars.

What to Charge for a Rainbow Chrome Install

The pricing math is different from regular wraps.

Material cost. Rainbow chrome runs roughly 2x to 3x the price of standard premium PET gloss vinyl. A full car needs 5 to 7 rolls.

Labour time. A full car rainbow chrome install runs 12 to 16 hours versus 6 to 8 hours for premium gloss. Compound curve panels (fenders, bumpers) take 2x normal install time because of the slower pace and double post heat.

Wastage allowance. Add 15 to 20% material wastage on the quote. Rainbow chrome cannot be repositioned freely (the holographic layer fatigues with each repeated lift), so install attempts that go wrong require fresh film.

A full car rainbow chrome install typically prices at $4,000 to $7,000 retail in North American and European markets. Customers who want this finish know it is expensive and understand why.

How Each Customer Pain Maps to a Specific Product

Installer Ivan, first rainbow chrome job. Practice on the smallest panel first (a hood or a mirror cover). Use the 3 tricks. → Order a single roll from the WM24 Rainbow Chrome range and a swatch to test on a practice panel before the customer install.

Show car build, full body. Wide spectrum rainbow with maximum colour shift. → Browse the full WM24 Rainbow Chrome range, pick by dominant shift colour.

Statement accent on a Tesla. Hood and roof only, sophisticated cool tone shift. → Single panel rainbow chrome in cool blue to purple direction.

Boutique tuner signature build. Custom colour rainbow shift if available, or pick a roll that matches the shop’s aesthetic. → Custom colour matching available with 5 roll MOQ.

Distributor stocking premium statement film. One or two rainbow chrome SKUs as the top tier statement product. → Stock the highest demand wide spectrum shift, plus one cool tone for variety.

Frequently Asked Questions

Is rainbow chrome harder to install than regular mirror chrome?

Yes, roughly twice as hard. The holographic interference layer in rainbow chrome does not stretch as well as the mirror layer alone. Compound curves are the failure point.

Can rainbow chrome be repositioned during install?

Limited. Unlike regular vinyl wraps which reposition freely with the adhesive, rainbow chrome’s holographic layer fatigues with each repositioning. Two or three repositions max before the film loses the rainbow shift in the lifted area.

How long does rainbow chrome last outdoor?

3 to 4 years outdoor in temperate climates with regular care. The holographic layer is the limiting factor. UV degrades the optical interference effect faster than the mirror layer beneath it.

Can I wash rainbow chrome like regular chrome?

Yes but more carefully. Hand wash only, no automatic car washes. The brushes can scratch the topcoat and dull the holographic effect. Microfibre cloth only, no chamois.

Will rainbow chrome show fingerprints?

Yes, more than regular chrome. The holographic layer scatters light in more directions, which makes fingerprint oils more visible. Plan on a weekly hand wipe down.

Is rainbow chrome roadworthy in all regions?

Check local regulations. Some regions restrict highly reflective or holographic wraps because they can distract other drivers. Most jurisdictions allow it on private vehicles but some require front bumper coverage to be modest.

Ready to Take the Rainbow Chrome Job?

Browse the full WM24 Rainbow Chrome range, the holographic chrome statement tier.

Free swatch sample of any rainbow chrome colour. Practice on a panel before the customer install. WhatsApp +86-13626505244 or email dasonchan@tsautop.com.
Why Rainbow Chrome Wraps Are Twice as Hard to Install workflow graphic
Save-worthy checklist for rainbow-chrome-wrap-install-guide

Why Gloss Vinyl Shows Orange Peel

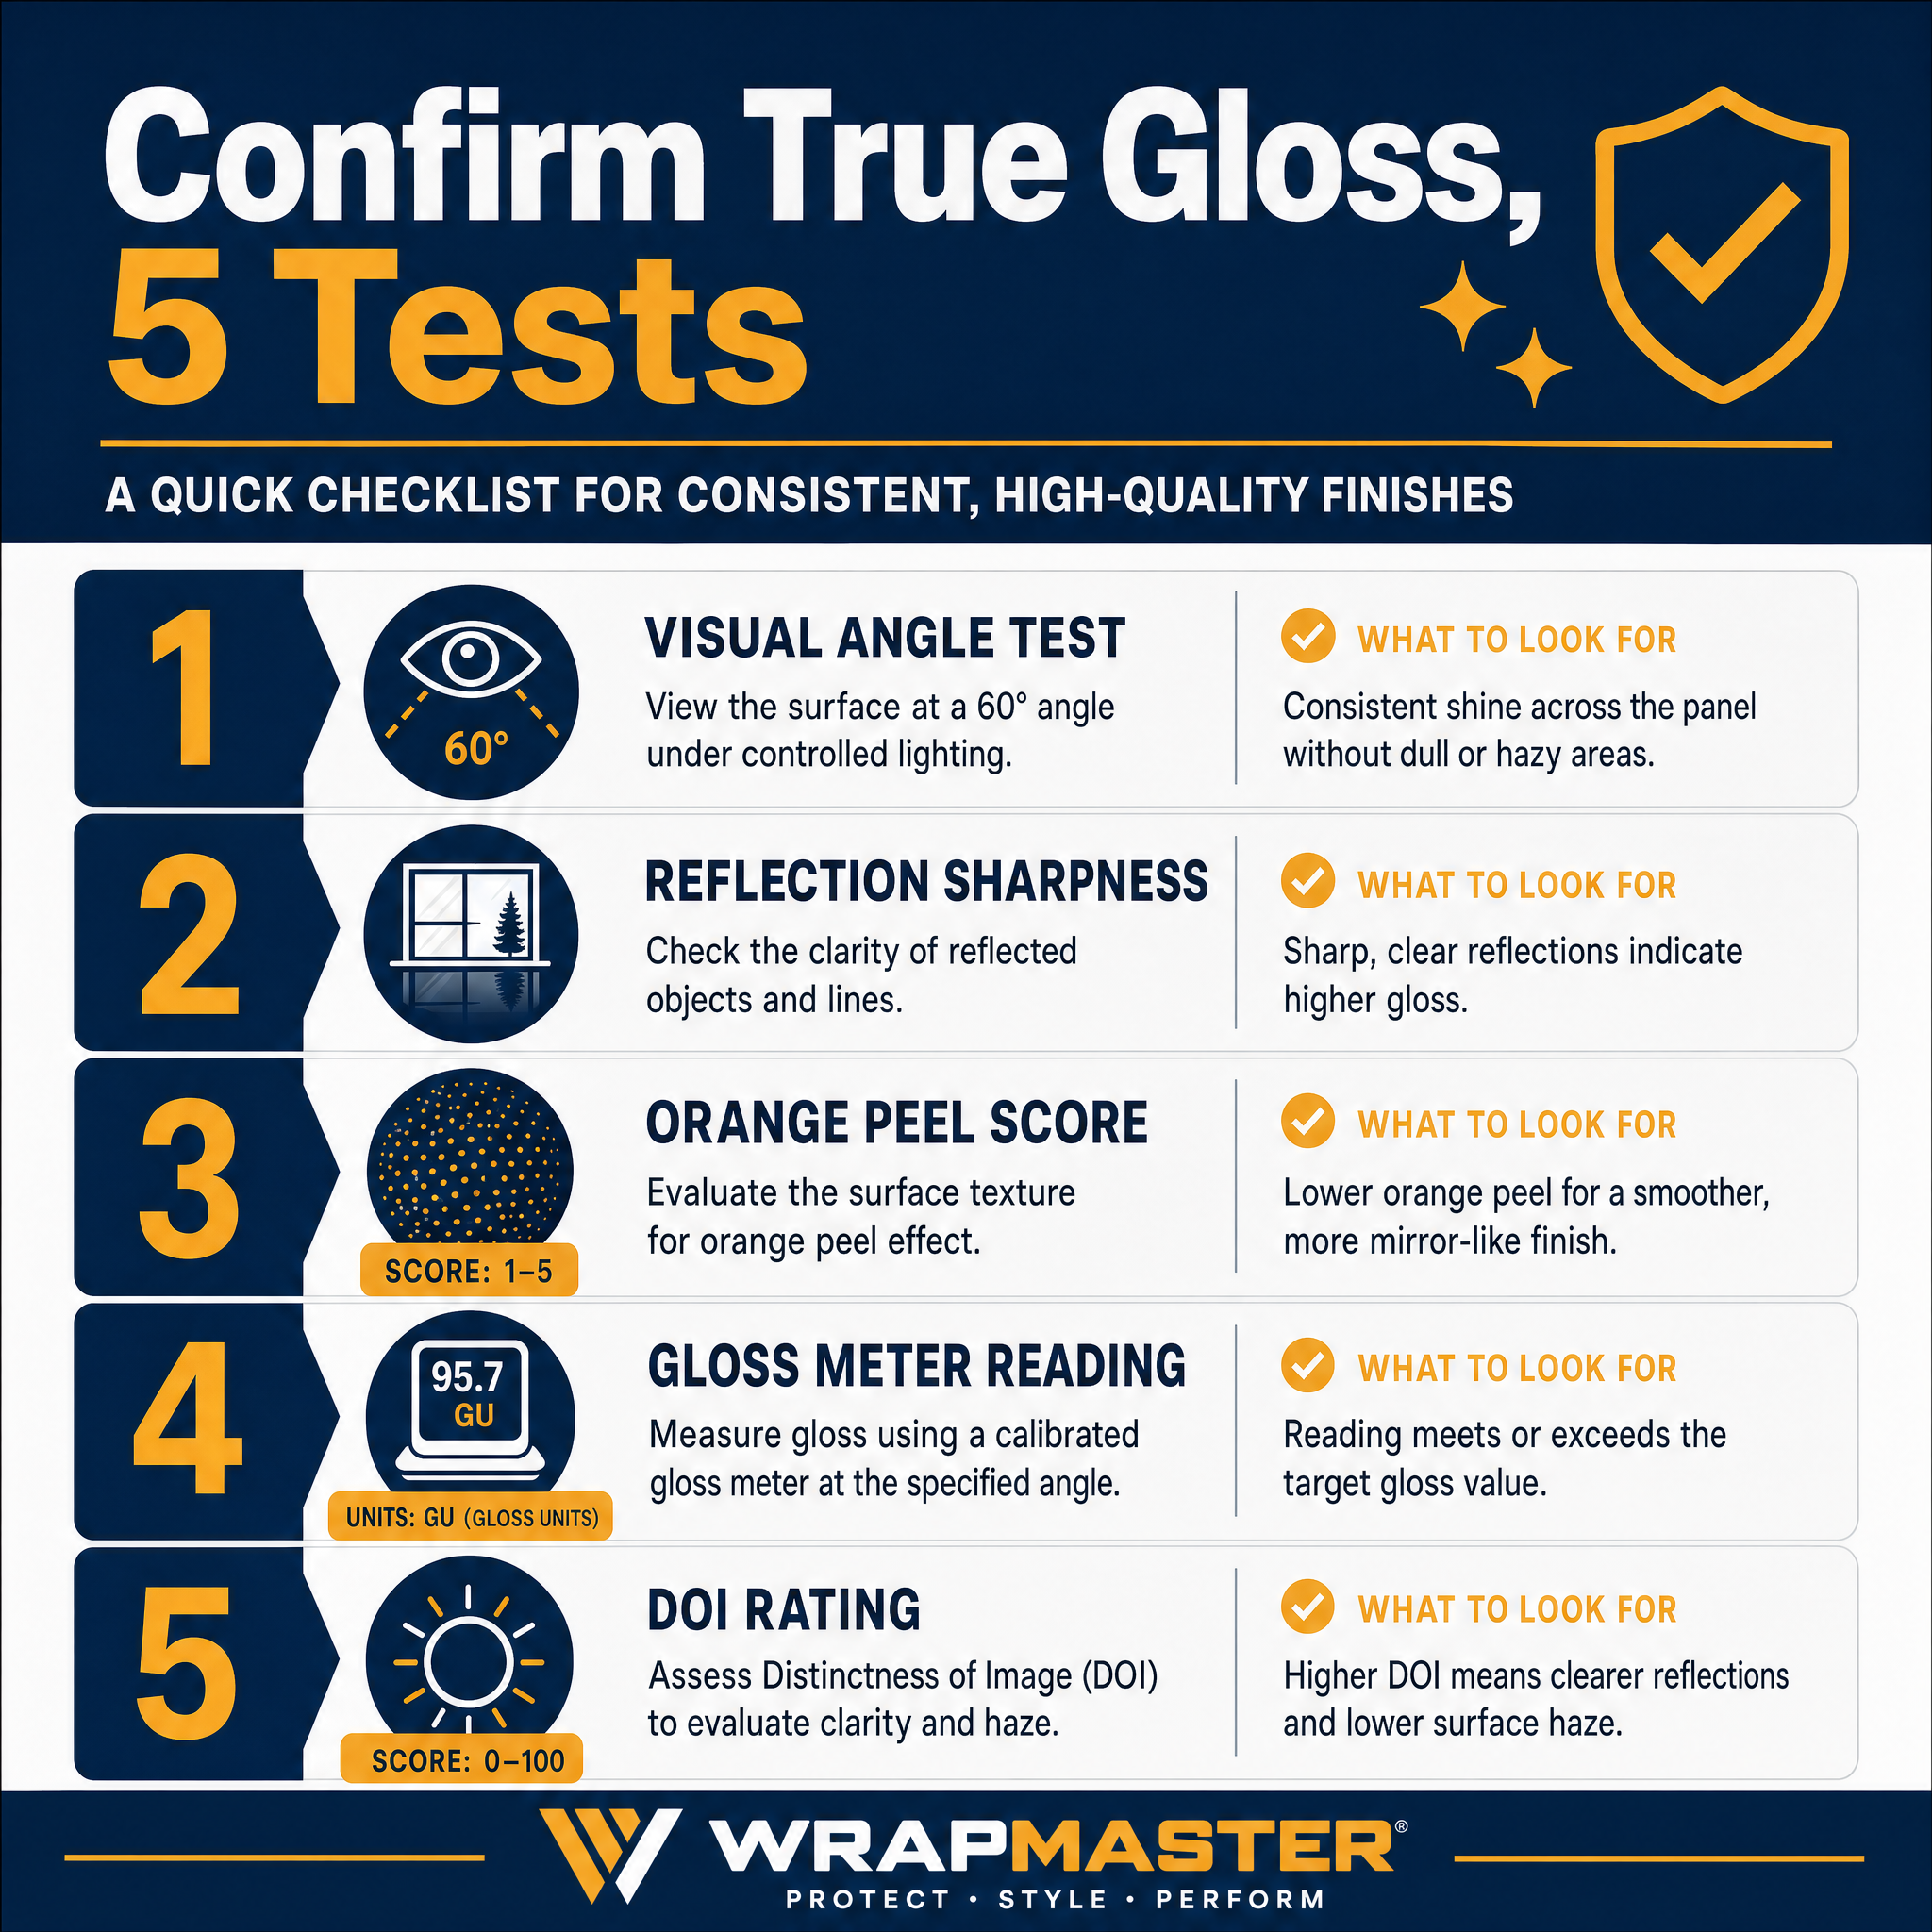
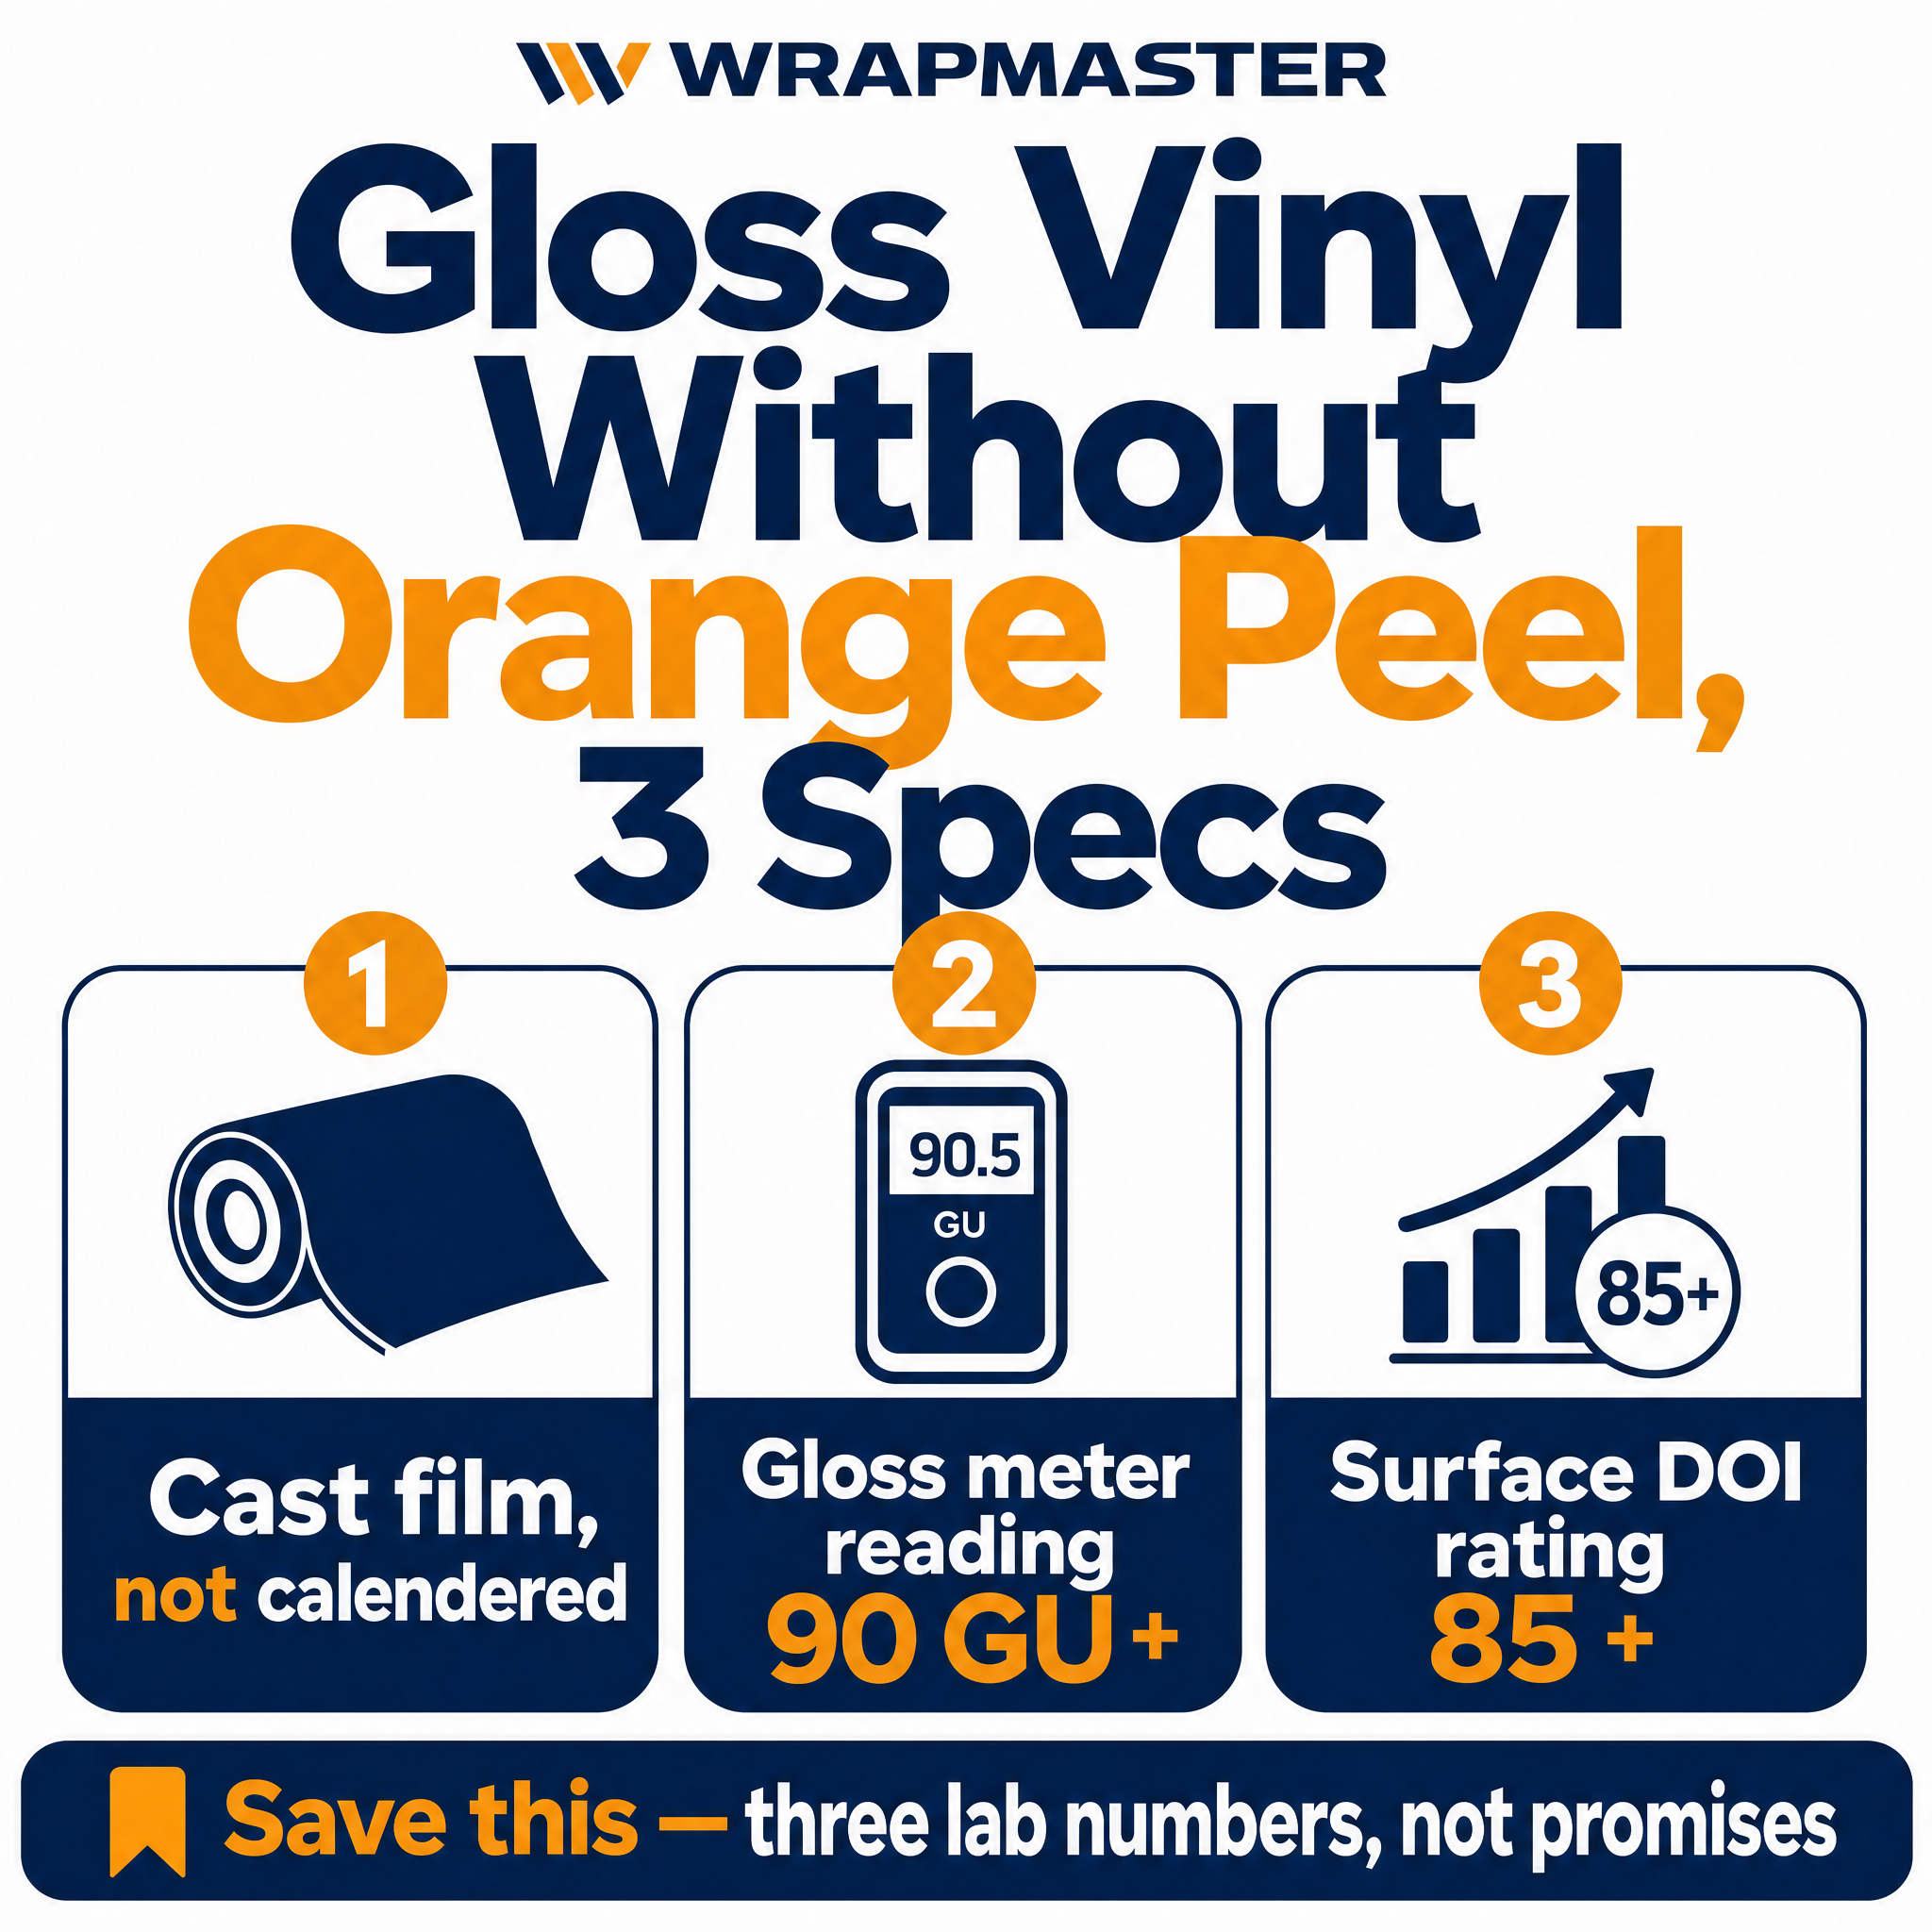
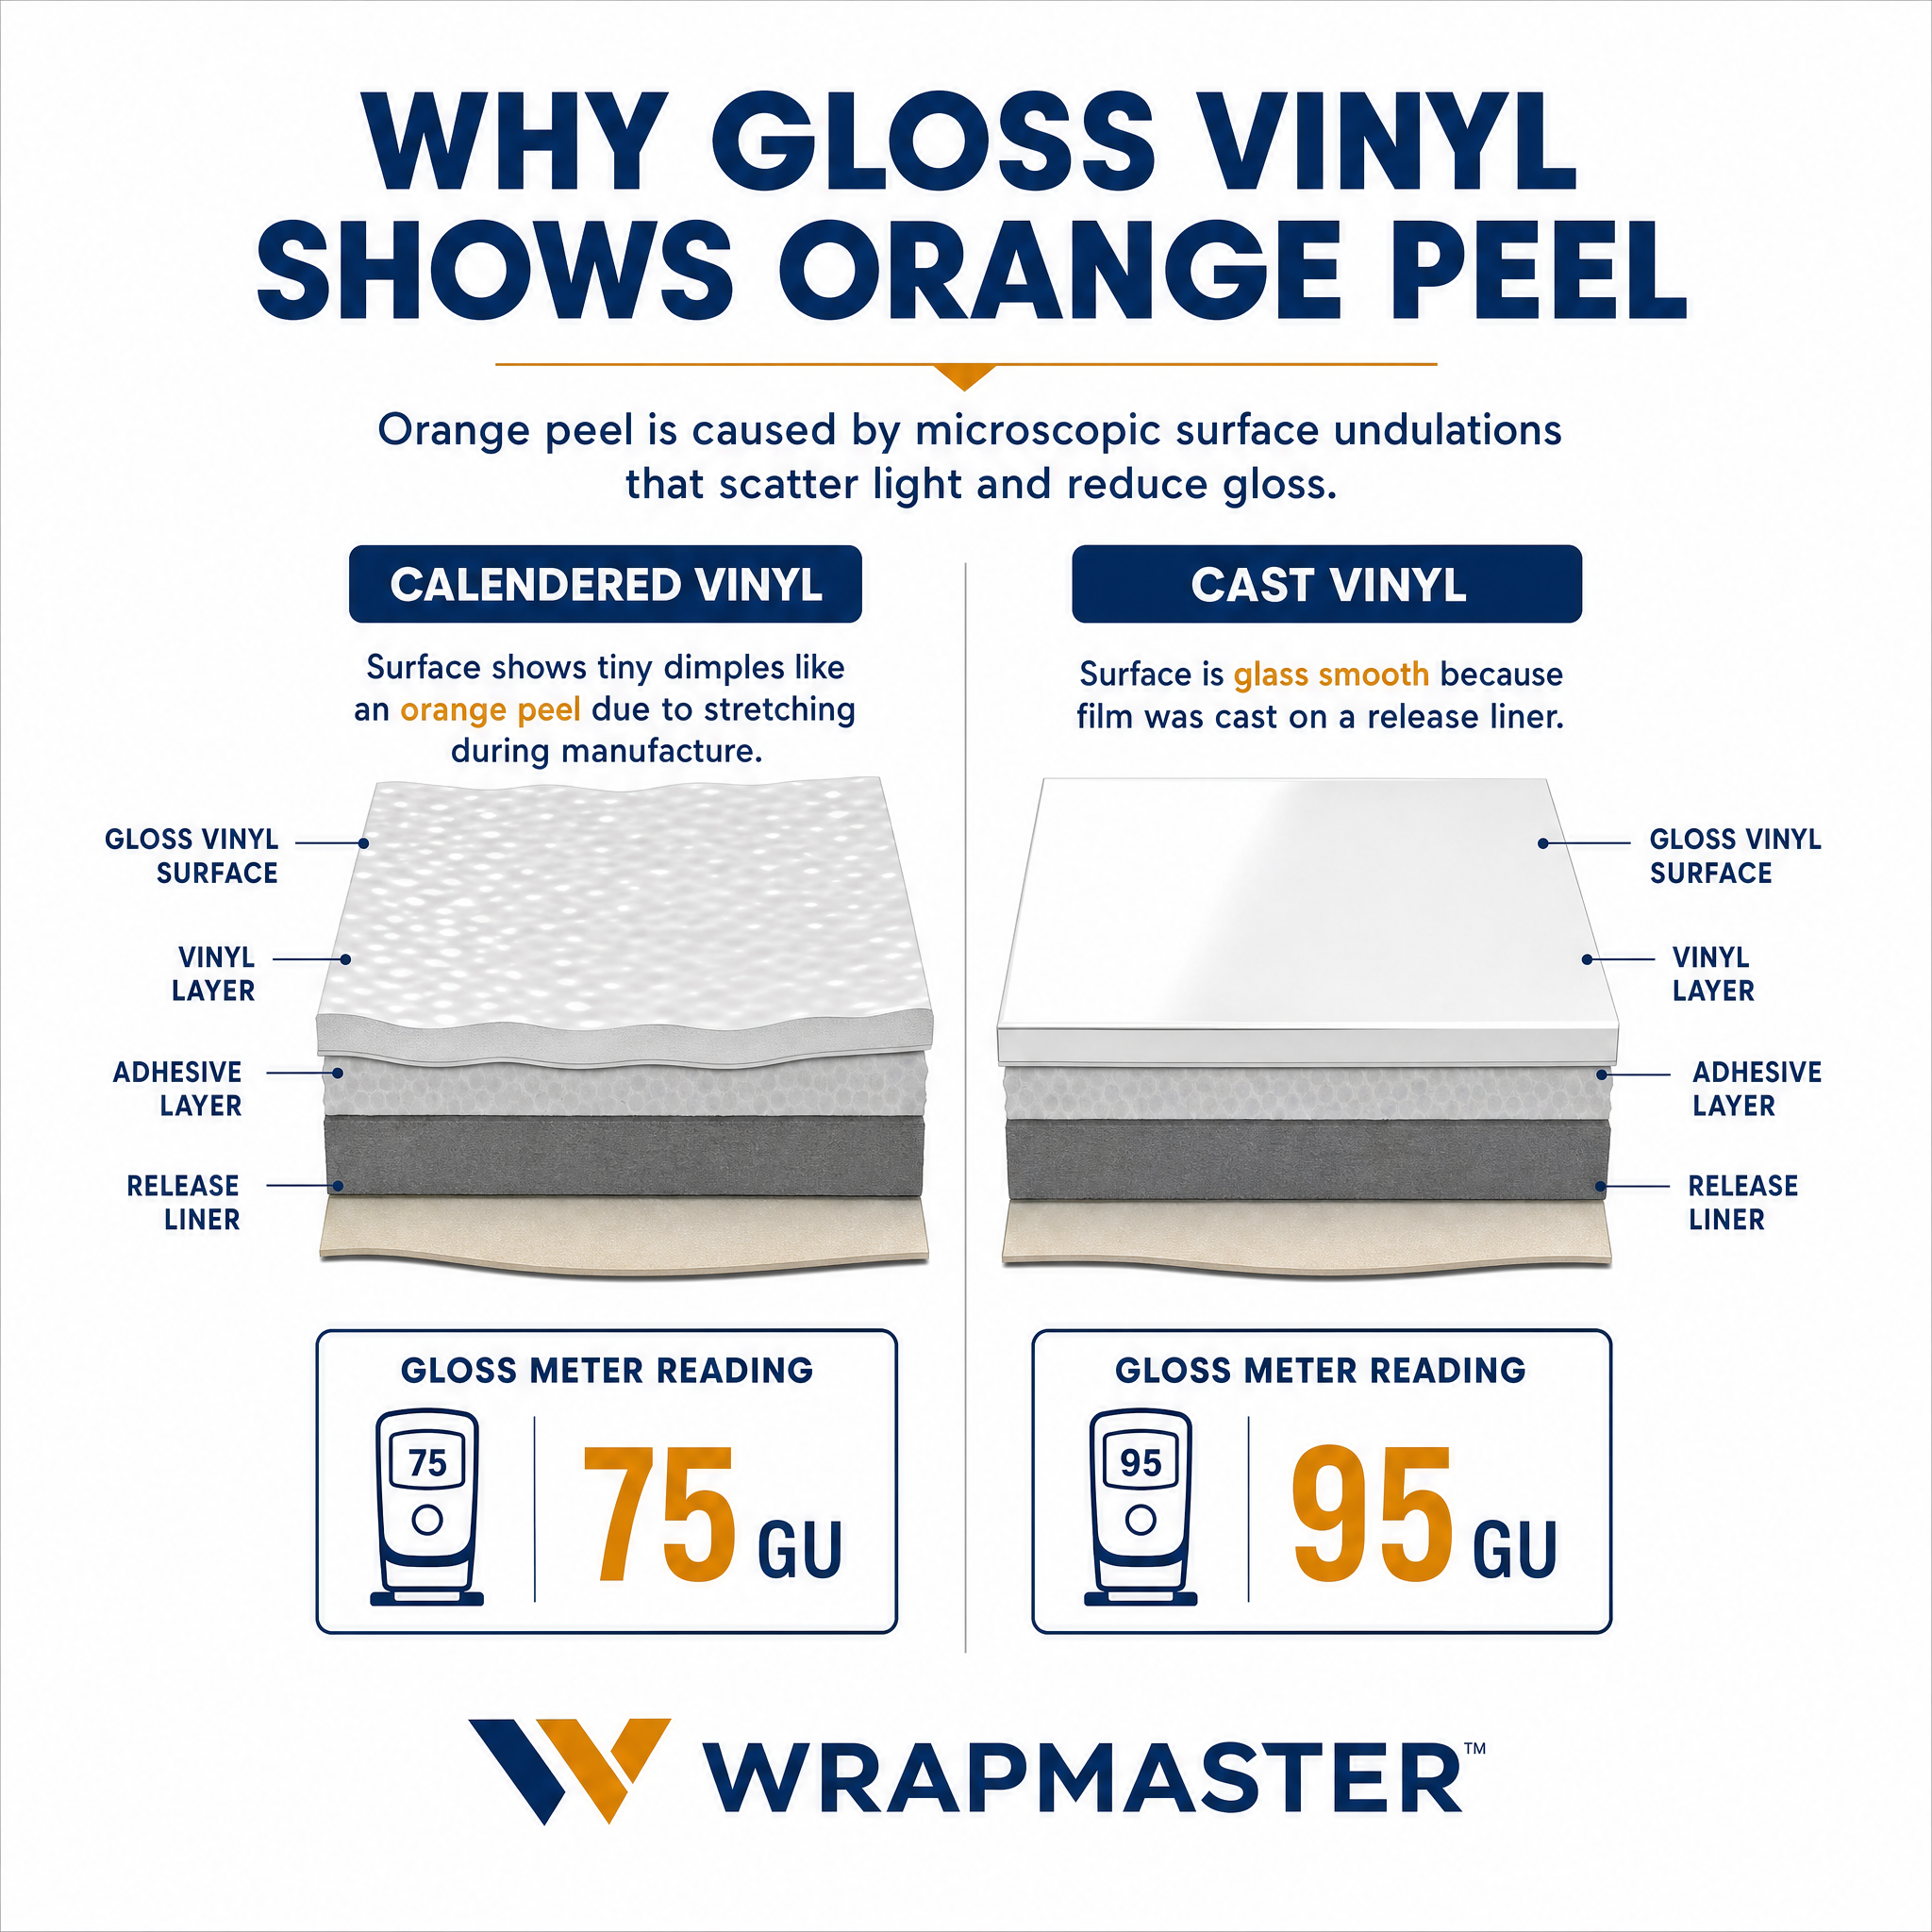
The short answer. Standard gloss vinyl wraps show orange peel because single layer PVC construction has a faintly wavy surface that is invisible up close but visible under sunlight from 2 metres away. Three specs predict gloss that stays mirror flat, one, PET double layer construction (not single PVC), two, gloss unit measurement above 95 GU at 60 degrees, three, DOI (Distinctness of Image) rating above 90. Our WM24 Super Glossy Crystal range is the zero orange peel premium tier built for show car and supercar applications.

Your customer wraps their car. In the workshop under fluorescent light it looks perfect. They drive home. They park in the sun. They walk back 2 metres from the car and see it. The hood looks like an orange skin. Tiny ripples cover the whole panel. They are back at your shop the next day demanding to know why their $3,000 gloss wrap looks worse than the OEM paint it covered.

This is the most common letdown in gloss vinyl wraps, and it has nothing to do with the install. It is a manufacturing artifact baked into single layer PVC vinyl. The PVC layer itself has a faintly wavy surface from the manufacturing process. That texture is invisible up close but unmistakable from 2 metres in sunlight.

The fix is not a different installer. The fix is a different construction. The rest of this article walks through why orange peel happens, the three specs that predict whether a gloss vinyl will show it, and points to our WM24 Super Glossy Crystal range, the zero orange peel premium tier.

Why Standard Gloss Vinyl Shows Orange Peel

Vinyl wrap is manufactured by extruding or casting PVC into a thin film, then adding adhesive on one side and a coloured layer plus topcoat on the other.

The PVC extrusion process leaves a slight surface texture. Under microscope, this looks like rolling hills, gentle waves across the film with a peak to peak spacing of 0.1 to 0.3 mm. The wavelength is small enough to be invisible at close range. It is large enough to be visible under directional light at distance, where the rolling waves catch and reflect sunlight unevenly.

That visible pattern is what the industry calls orange peel, because under direct sun it looks like the textured skin of an orange.

Three things make orange peel worse on standard gloss vinyl.

Thinner film. Less material body means the PVC waves transfer directly to the surface. Cheap gloss vinyl at 80 microns shows more orange peel than premium at 120 microns.

Cheaper PVC formulation. Premium PVC compounds have plasticisers that smooth the wave amplitude during extrusion. Cheap PVC skips these.

Single layer construction. This is the biggest factor. Single layer PVC means the surface you see is the PVC layer itself, complete with its manufacturing texture. Double layer PET on PVC means a separate PET film sits on top, and PET is manufactured by a different process that does not produce orange peel.

Why Gloss Vinyl Shows Orange Peel chemistry graphic

The 3 Specs That Predict Mirror Flat Gloss

Spec 1, Construction Method (Double Layer PET on PVC)

This is the single most important spec for orange peel free gloss.

  • Single layer PVC. The surface visible to the customer is the PVC layer. Shows orange peel under sunlight. Standard for budget gloss vinyl.
  • Double layer PET on PVC. A PET top layer is laminated onto the PVC base. PET is manufactured by a film casting process that produces microscopically flat surfaces. Zero orange peel.

PET double layer construction adds roughly 20 to 30% to manufacturing cost. The difference shows up immediately under direct sun.

Spec 2, Gloss Unit (GU) Measurement at 60 Degrees

Gloss is measured with a gloss meter that shines light at the surface and measures reflection. The 60 degree measurement is the standard for automotive applications.

  • 80 GU and below. Visible orange peel and lower sheen. Standard for cheap gloss vinyl.
  • 85 to 92 GU. Decent gloss but slight orange peel visible under sun. Mid tier gloss vinyl.
  • Above 95 GU. Mirror flat finish, no visible orange peel. Premium crystal gloss tier.

Premium suppliers publish gloss unit measurements on the spec sheet. If the supplier cannot quote a GU number, the measurement was never made.

Spec 3, DOI (Distinctness of Image) Rating

DOI measures how clearly a reflected image (like a building or a tree) appears on the wrapped surface. It is a different measurement from gloss because high gloss does not always mean clean image reflection.

  • Below 80 DOI. Reflected images look distorted, broken at the edges. Orange peel showing.
  • 80 to 90 DOI. Reflected images mostly clean with minor distortion.
  • Above 90 DOI. Reflected images are mirror clean, no distortion. Premium gloss territory.

DOI is the measurement that translates “looks like wet paint” into a number. WRAPMASTER WM24 Super Glossy Crystal range targets DOI above 90.

Which Crystal Gloss In Our Range For Which Customer

Our WM24 Crystal Gloss category sits at the top of the gloss tier. Built on PET double layer construction with gloss units above 95 GU and DOI above 90. The Gloss Macaron Wrap subcategory carries the highest demand colours.

The range covers most popular automotive gloss colours. Browse the full lineup at the WM24 Crystal Gloss category page for current colour availability.

Application Best for
Full body show car wrap Premium gloss DOI above 90, supercar territory, show class builds
Daily driver who wants paint quality look Same gloss tier without paint cost, retains for 5+ years
Boutique tuner shop signature builds Statement gloss colours that match OEM paint quality
Tesla / EV premium wraps Mirror flat gloss to complement the modern aesthetic
Distributor stocking premium gloss line The flagship product tier above standard PET gloss

The customer demographic for crystal gloss is anyone who has noticed orange peel on a previous gloss wrap and refuses to live with it again. Once a customer sees the difference under direct sun, they do not go back.

When Standard PET Gloss Is Still the Right Answer

To be fair, not every job needs crystal gloss tier.

  • Fleet wraps cycled every 2 to 3 years. Standard PET gloss is fine, the cars are replaced before the orange peel concern matures.
  • Partial wraps and accent panels. A hood wrap or roof wrap is less affected by orange peel than a full body because the panel is viewed from fewer angles.
  • Wraps planned for removal within 12 months. Short term applications do not justify the price premium.
  • Buyers on tight budget. Standard PET gloss is significantly cheaper. The buyer accepts orange peel as the trade off.

For full body daily driver wraps and any premium build, crystal gloss is the honest answer.

How Each Customer Pain Maps to a Specific Product

Installer Ivan with show car build customers. Crystal gloss DOI 90+ tier. → Browse the WM24 Crystal Gloss range for current colours.

Premium tuner shop building a signature line. Lead with 3 to 5 crystal gloss colours that match the shop’s signature aesthetic. → Custom colour matching available with 5 roll MOQ.

Customer rewrapping their car after orange peel disappointment. Crystal gloss tier specifically. Show them a swatch in direct sun before they order. → WM24 Crystal Gloss range.

Distributor David positioning a flagship gloss line. Crystal gloss as the top tier in a 3 tier gloss offering. Sits above standard PET gloss and budget calendered gloss. → Stock the four highest demand colours from the range.

Boutique daily driver buyer who wants paint quality look. Crystal gloss in OEM matched colour. → Custom colour matching service, send paint sample.

Frequently Asked Questions

What is orange peel in a vinyl wrap?

Orange peel is the visible wavy texture on a gloss surface that looks like the skin of an orange. It comes from the manufacturing process of the underlying film. Standard single layer PVC vinyl shows orange peel. Double layer PET on PVC vinyl does not.

Is orange peel an install problem or a film problem?

Almost always a film problem. Cheap single layer PVC gloss shows orange peel regardless of how perfectly it is installed. The fix is choosing a film with PET double layer construction.

What gloss unit measurement is considered mirror flat?

95 GU or above at the 60 degree measurement angle is the threshold for visible orange peel free finish. Premium crystal gloss tiers (like the WM24 range) target 95 to 105 GU.

Does crystal gloss vinyl last as long as standard gloss?

Yes, equal or longer. The PET double layer construction adds physical protection on top of the colour layer. Lifespan 5 to 7 years outdoor, equal to or better than standard PET gloss.

Can I see the orange peel difference under workshop lighting?

Partially. Workshop fluorescent or LED lighting is diffuse, which mutes the orange peel visibility. The honest demo is outdoor under direct sun from 2 metres away. Always swatch test outdoors before committing.

Is crystal gloss vinyl harder to install than standard gloss?

Slightly. The mirror flat surface shows every fingerprint, dust speck, and squeegee mark during install. Installers need to maintain a cleaner work environment and use lint free gloves. The install techniques are the same as standard premium PET gloss.

Ready to Stop the Orange Peel Callback?

Browse the WM24 Crystal Gloss range, the zero orange peel premium tier. PET double layer construction, 95+ gloss units, DOI above 90.

Free swatch sample of any crystal gloss colour. Test it outdoors under direct sun before you commit. WhatsApp +86-13626505244 or email dasonchan@tsautop.com. Spec sheet with gloss unit and DOI measurements on request.

Why Gloss Vinyl Shows Orange Peel workflow graphic
Save-worthy checklist for why-gloss-vinyl-shows-orange-peel

Why Cheap Wrap Tools Cost 30 Minutes Per Panel

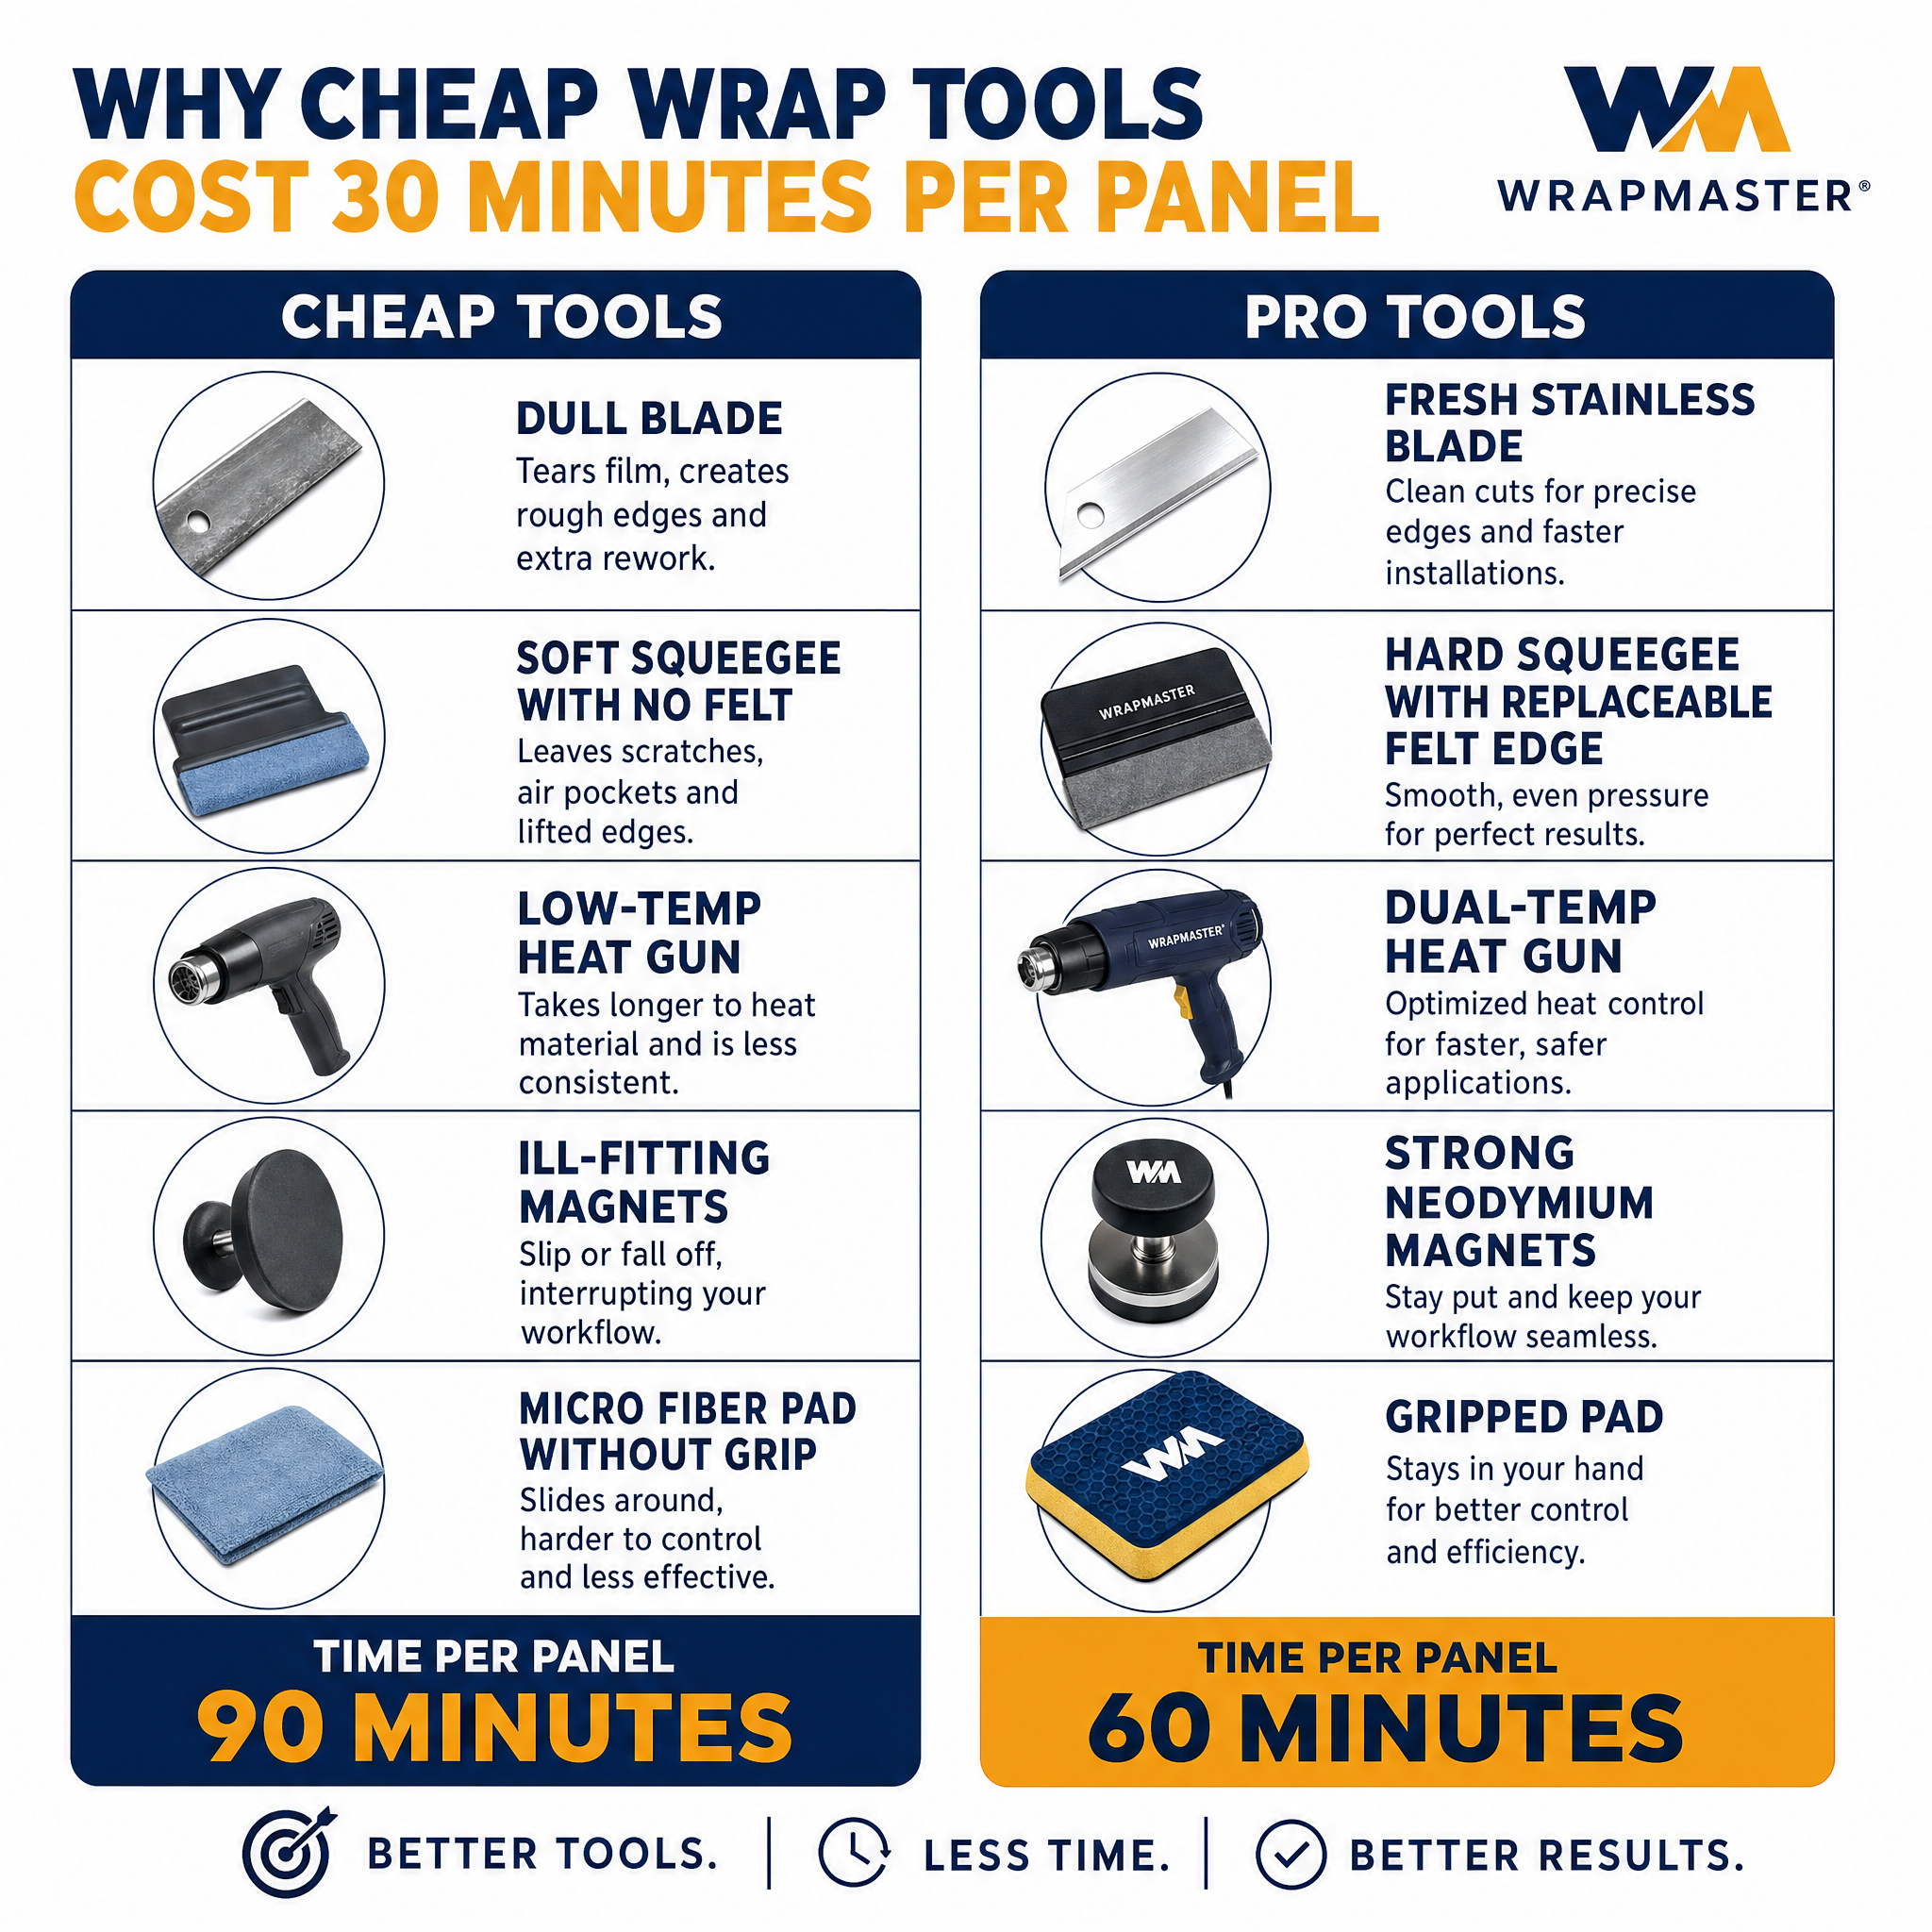
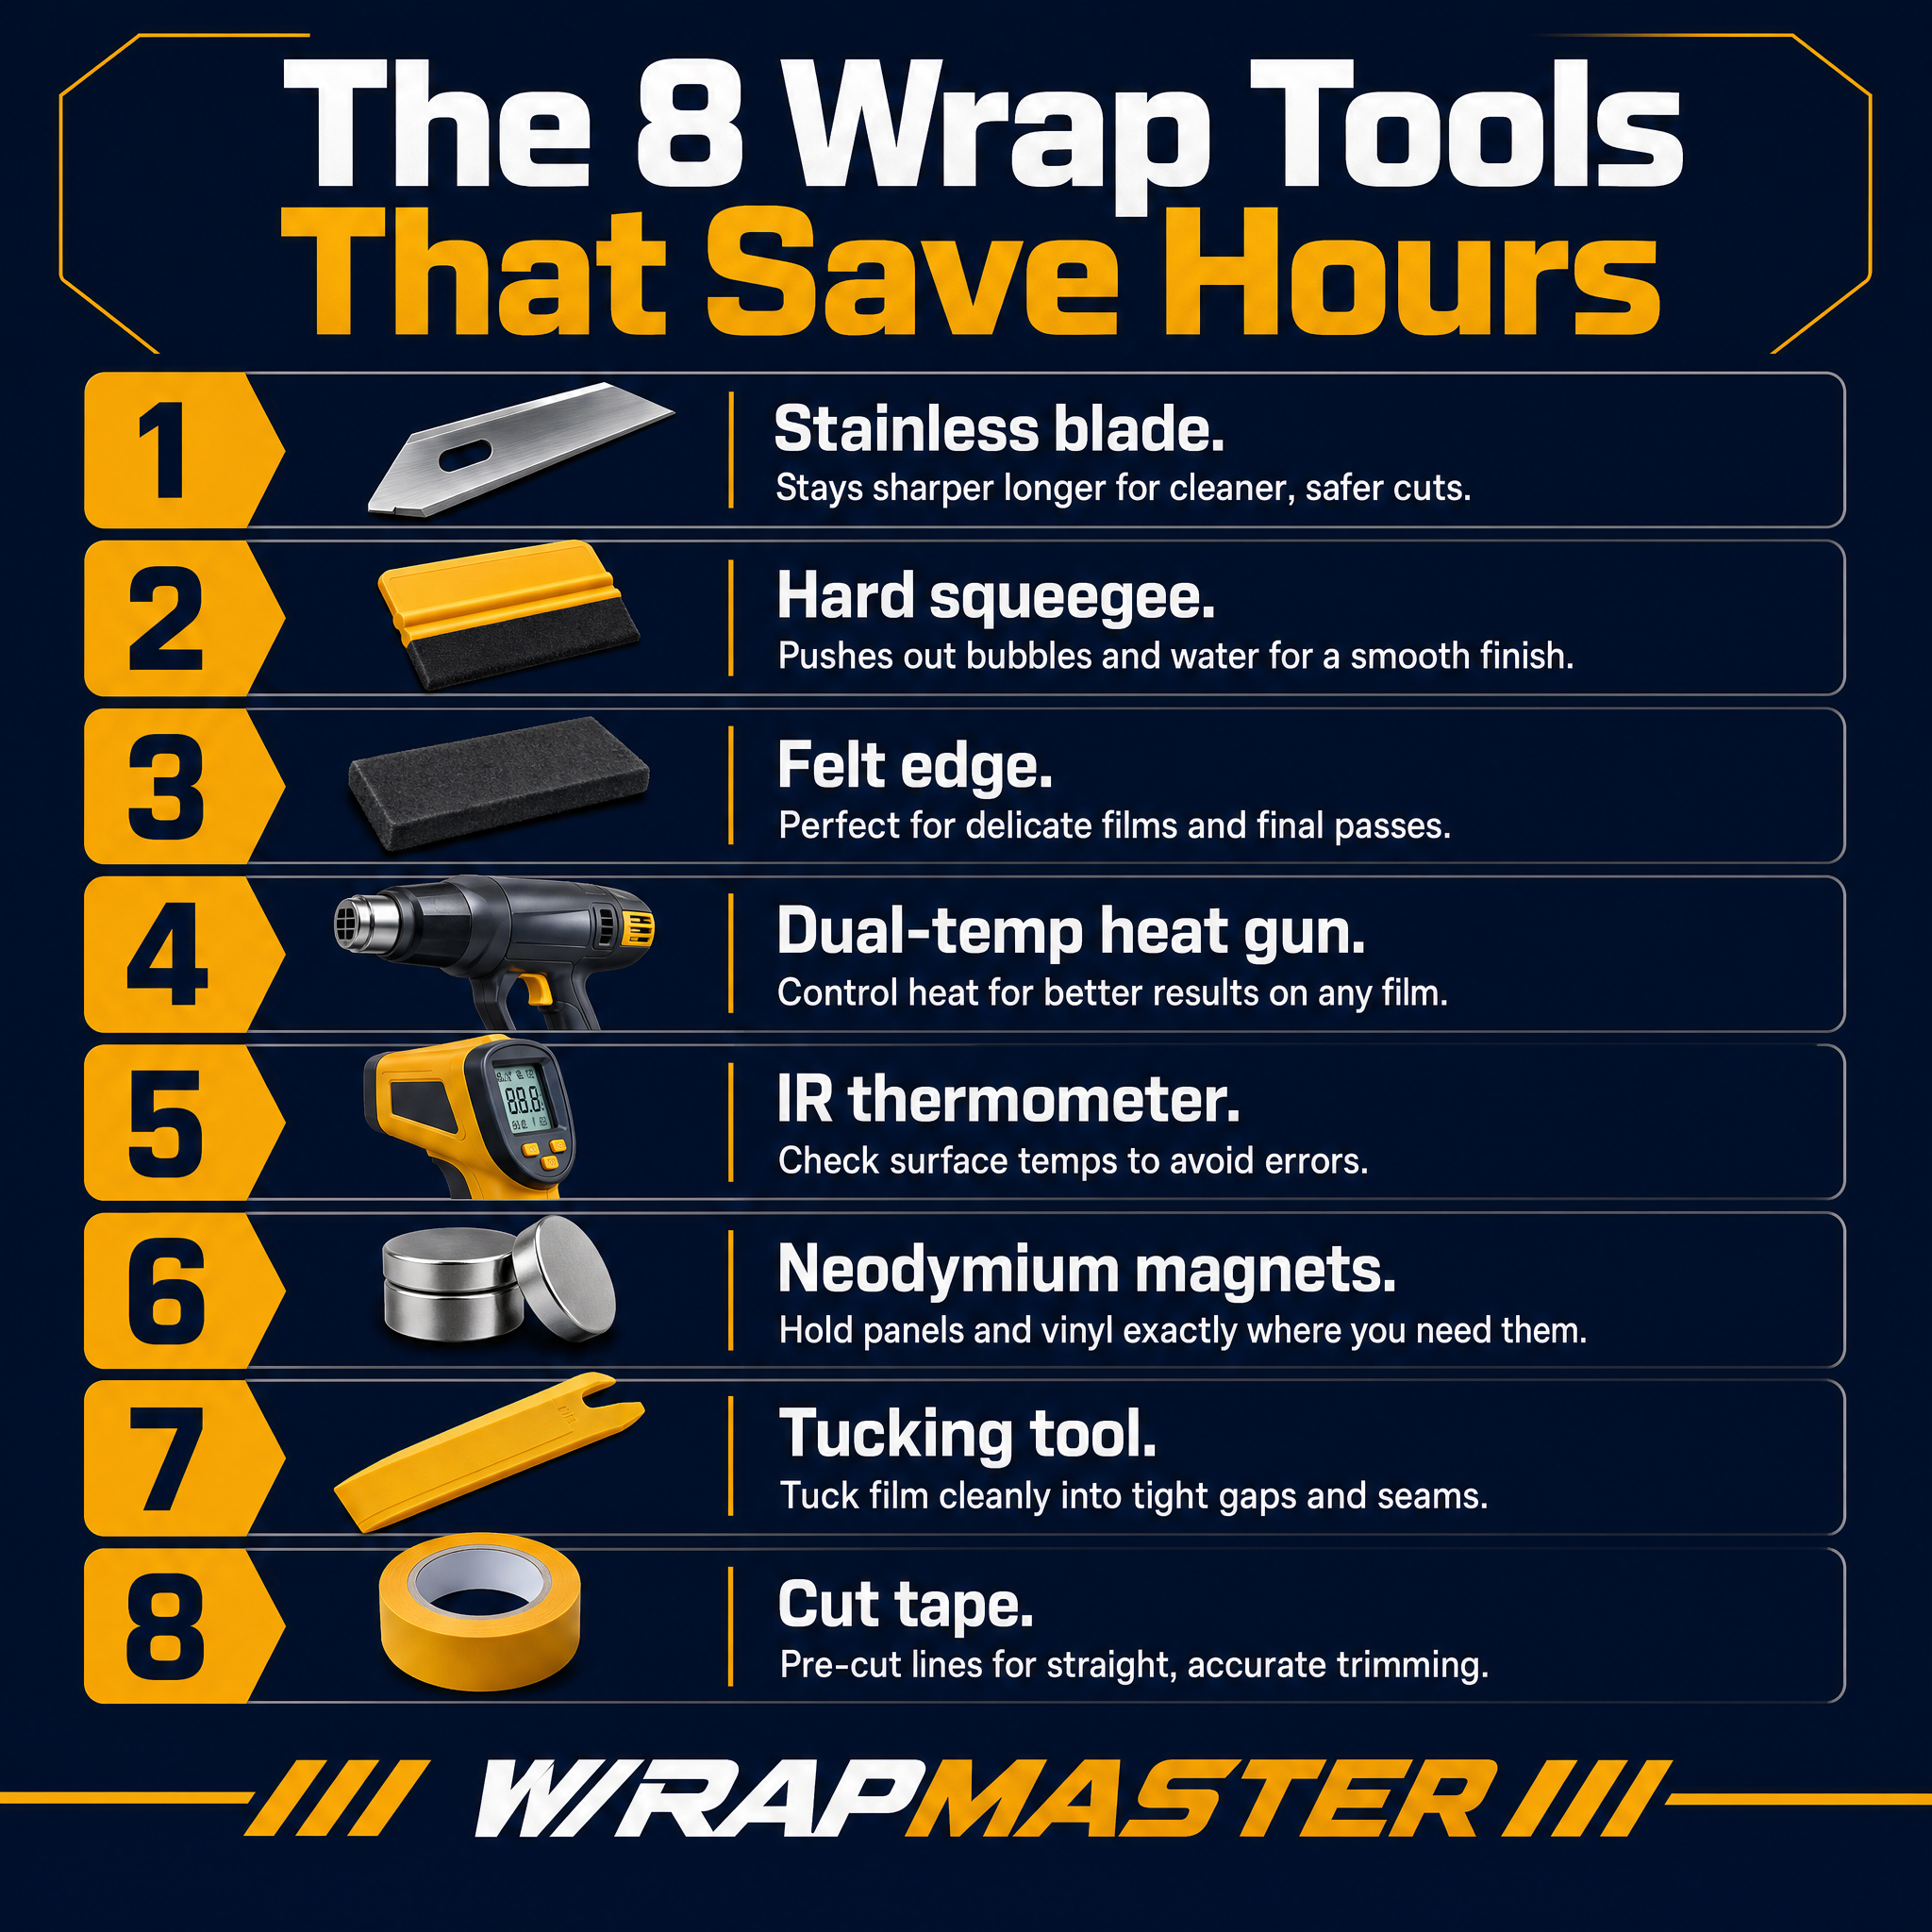
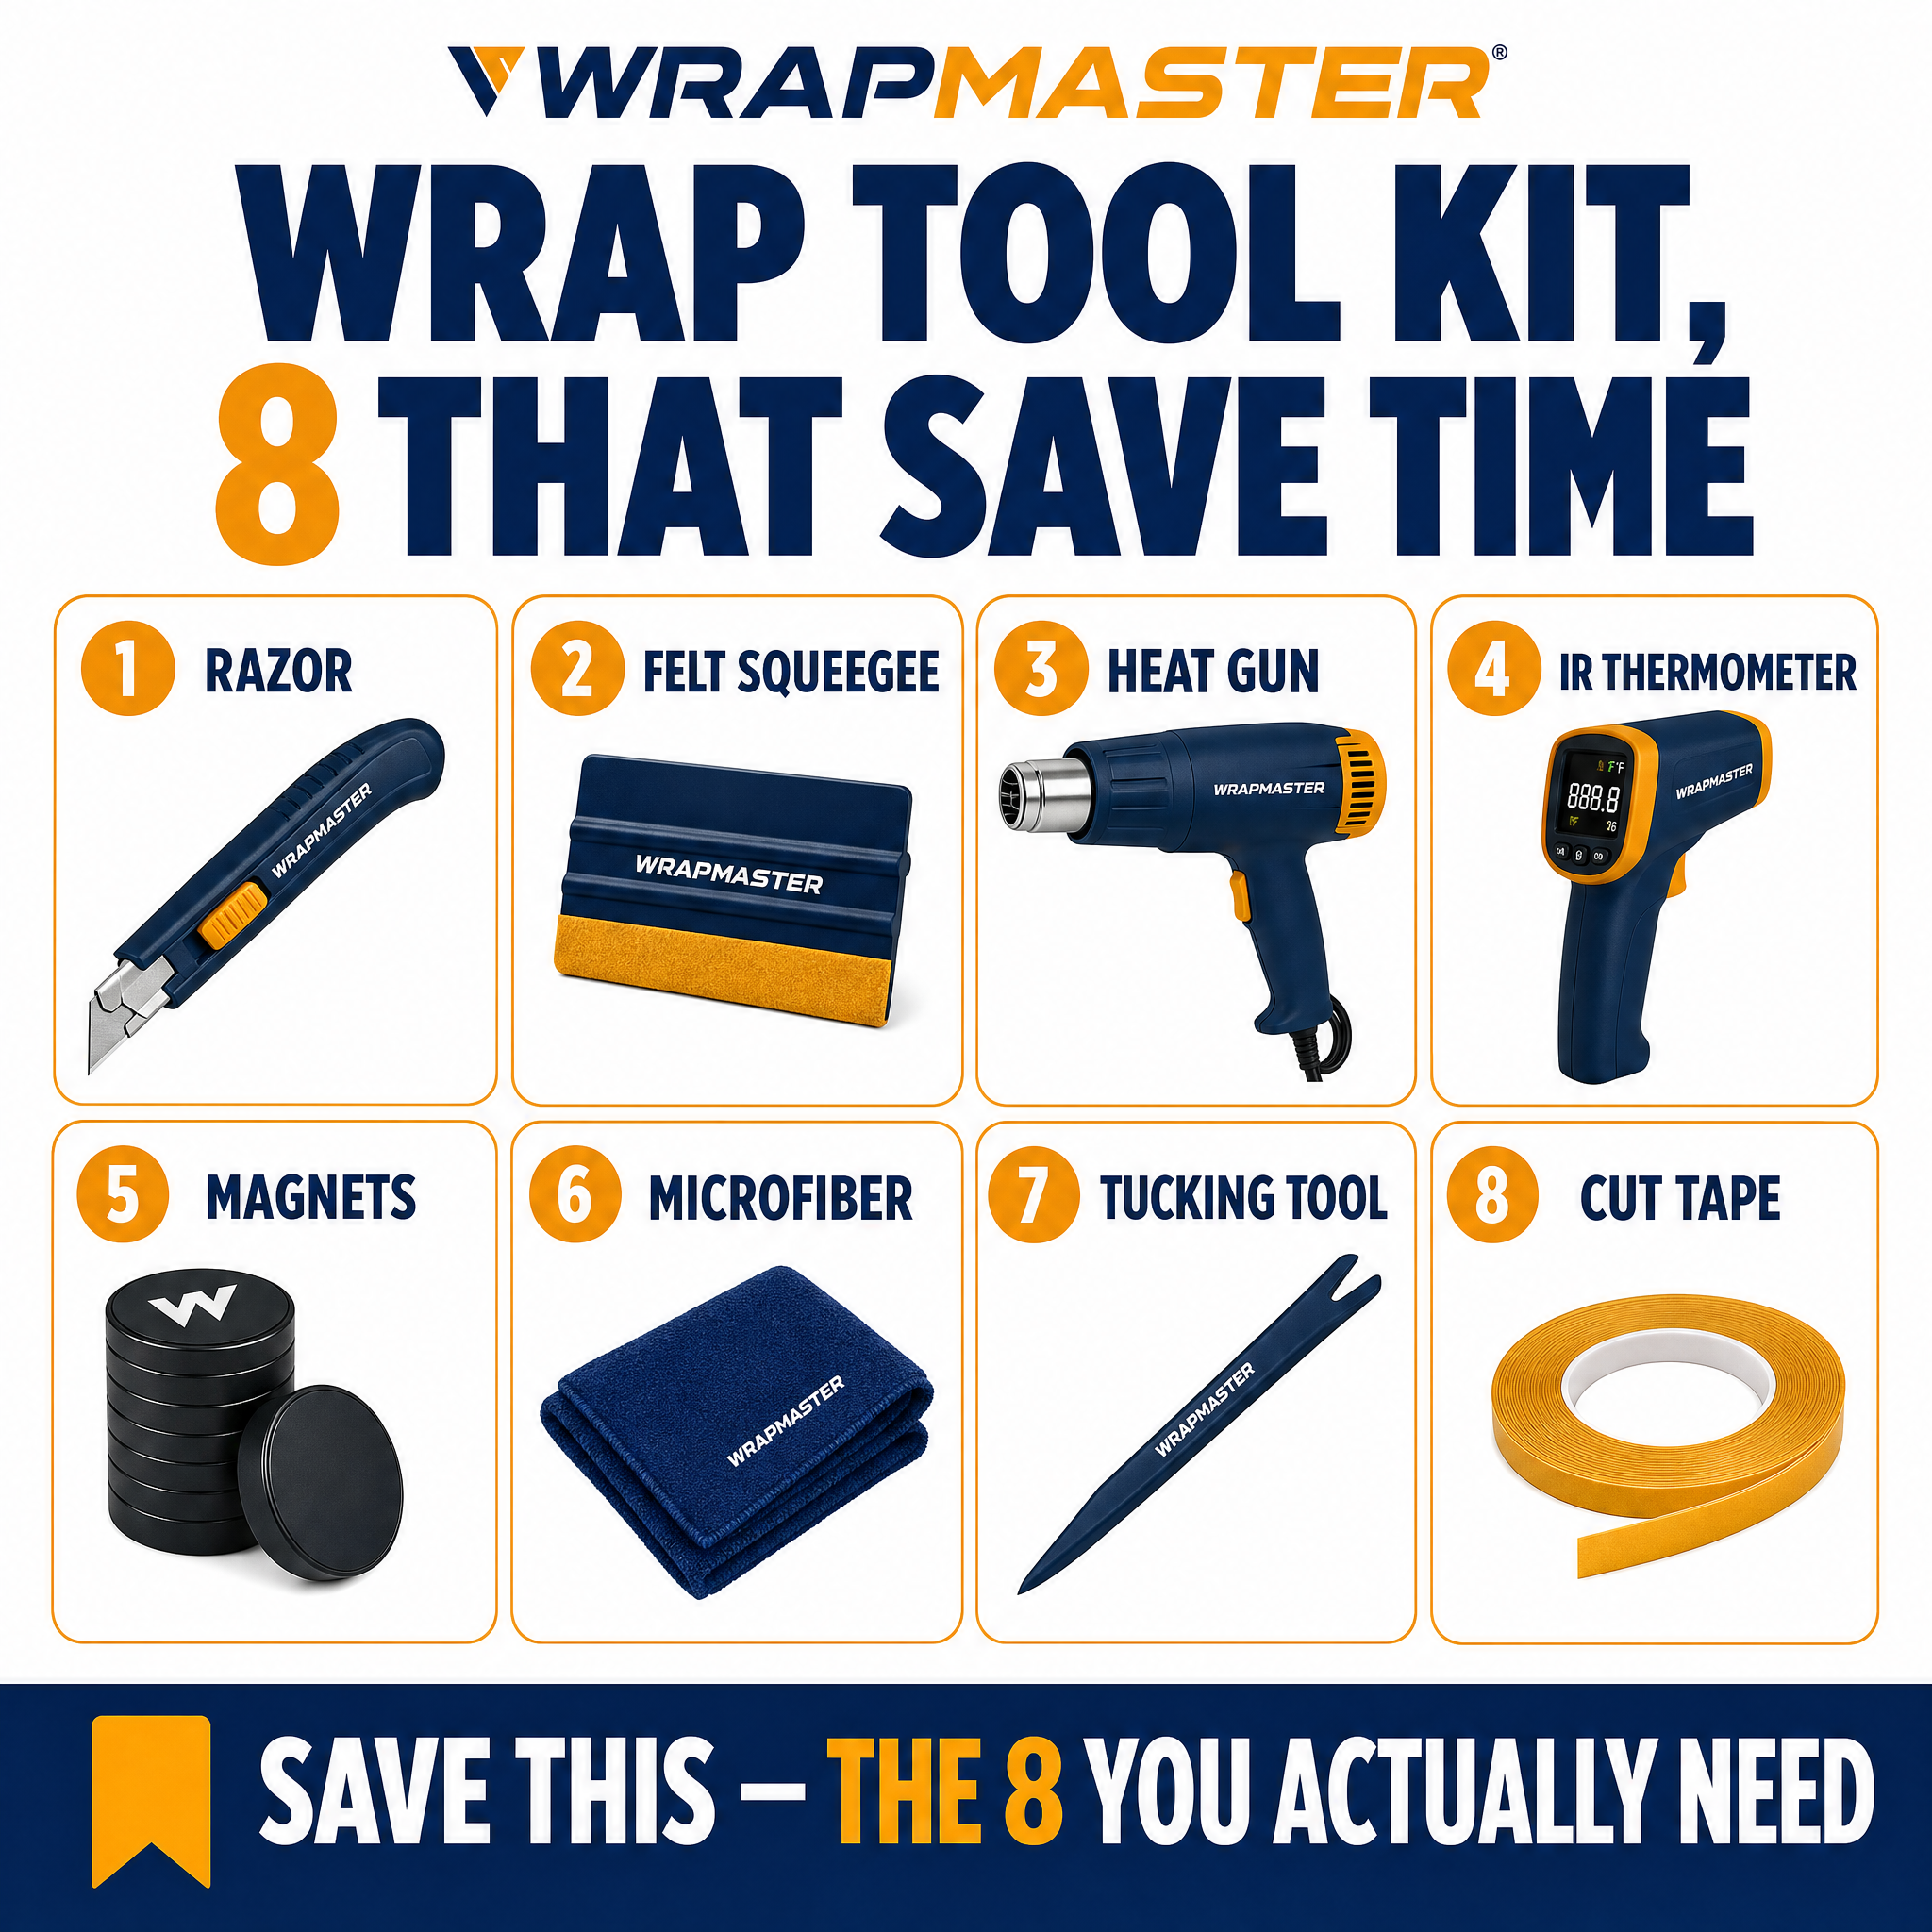
The short answer. Cheap wrap tools cost professional installers 30 to 60 minutes per panel in wasted time, plus film callbacks when sharp edges scratch the surface. The eight tools every wrapper needs, one, premium felt buffer squeegee, two, hard plastic squeegee, three, blue or yellow sharp blade vinyl knife, four, knifeless tape, five, magnetic vinyl holder, six, wrap glove, seven, infrared thermometer, eight, heat gun. Our Car Wrapping Tools range carries 13 piece and 21 piece complete kits plus individual replacements.

A wrap shop owner watched his apprentice spend 45 minutes on a hood that should have taken 20. The kid was using a $5 plastic squeegee with no felt, sawing at the vinyl with a craft knife, and had no thermometer to check panel temperature. Every panel took twice as long. The vinyl had drag marks. The customer noticed.

Tools are the single most underrated investment in a wrap business. A premium toolkit costs $200 to $400 and lasts years. A bad toolkit saves $150 once and costs hundreds of hours over the life of the shop. The math is not subtle.

The eight tools below are what separates a 20 minute hood install from a 45 minute hood install. The rest of this article walks through them and points to the kits and individual items in our Car Wrapping Tools range.

Why Cheap Tools Cost So Much Time

Three reasons.

Friction and drag. Cheap plastic squeegees without felt buffers drag against vinyl. Every pass leaves micro scratches. Installers compensate by going slower and gentler, which doubles install time per panel. Premium felt buffer squeegees glide and let you push hard.

Dull blades and inconsistent cuts. Cheap vinyl knives lose edge after 20 to 30 cuts. Dull blades tear vinyl instead of slicing it, which means lifting the edge to trim, which means slower trim work and ragged edges that need re-cutting.

No proper hold during install. Without magnets, you are holding the vinyl with one hand while squeegeeing with the other. Half your install time goes to repositioning. Magnets hold the vinyl exactly where you want it, freeing both hands for the actual install.

The tools are not glamorous. They are the difference between 4 panels per day and 6 panels per day.

Why Cheap Wrap Tools Cost 30 Minutes Per Panel chemistry graphic

The 8 Tools Every Installer Needs

Tool 1, Felt Buffer Squeegee

The primary squeegee for laying vinyl. Used 80% of the install.

  • Cheap. Hard plastic edge directly on vinyl. Drag marks, micro scratches, slow installs.
  • Premium. Hard plastic body with replaceable felt buffer edge. Felt absorbs friction and glides. Allows hard pressure without scratching.

Replace felt buffers every 50 to 100 installs. Worn felt loses its glide.

Tool 2, Hard Plastic Squeegee

For tight corners, panel edges, and curve work where the felt buffer cannot reach. Smaller, harder, sharper edge than the felt buffer.

Premium hard squeegees have a slight bevel on the edge to push vinyl into recesses without cutting it. Cheap ones have a flat 90 degree edge that lifts vinyl out of the recess.

Tool 3, Vinyl Knife with Sharp Blades

The single most underrated tool. Trimming makes or breaks the final look.

  • Cheap craft knife. Loses edge in 20 cuts. Inconsistent depth. Tears vinyl at the trim line.
  • Premium vinyl knife with snap off blade. Yellow blade for medium work, blue blade for delicate trim. Snap a fresh segment every 50 cuts. Clean slice every time.

A pack of premium snap off blades costs $5 and gives you 50+ fresh edges. Stop reusing dull blades.

Tool 4, Knifeless Tape

Pre-measured tape with a finishing line that lets you cut vinyl without using a blade against the paint. Critical for full vehicle wraps where blade work risks paint damage.

Knifeless tape costs more than a plain knife cut but pays back instantly the first time it saves you from cutting paint on a customer’s hood.

Tool 5, Magnetic Vinyl Holder

Magnets that hold the vinyl in position during install. 6 to 12 magnets per panel.

  • Cheap fridge magnets. Pull strength too low. Vinyl slips during install. You lose alignment.
  • Premium wrap magnets. Strong pull (Newton rated), rubber coated to protect both paint and vinyl. Hold position even on inclined panels.

The freedom to use both hands for squeegeeing is what shaves the most time off installs.

Tool 6, Wrap Glove

Cotton or microfibre glove worn on the installer’s hand. Two jobs, prevent fingerprints on the vinyl during handling, and protect skin from heat gun work.

Cheap gloves leave lint on the vinyl. Premium installer gloves are lint free and survive 100+ wraps.

Tool 7, Infrared Thermometer (Non Contact)

Reads the panel surface temperature. Critical for stretch work on curves where film temperature determines whether it stretches cleanly or tears.

Most installers skip this and guess panel temperature by feel. Guessing is wrong roughly half the time. A $20 IR thermometer eliminates the guess.

Tool 8, Heat Gun (Variable Temperature)

Required for stretch work on curves, post heat to lock vinyl, and chrome installs.

  • Cheap fixed temperature heat gun. Two settings, off and too hot. Can melt or distort vinyl.
  • Premium variable temperature heat gun. Adjustable 50 to 600°C, hot or warm air settings. Different temperatures for different jobs.

For chrome wraps specifically, you need to stay in the 80 to 100°C range. Below 80, chrome cracks. Above 120, chrome dulls. A variable heat gun is mandatory for chrome work.

Which Tool Kit In Our Range For Which Stage

Our Car Wrapping Tools category carries complete kits and individual replacements.

Product Best for
13pcs/set Car Wrapping Tool Kit Apprentice installers, mobile detailers starting wrap services, weekend hobby installers. Covers the 13 most used tools.
21pcs/set Wrapping Tool Kit Full time wrap shop pro kit. Covers everything in the 13pc plus advanced tools (multiple blade types, additional magnets, specialty squeegees).
Knifeless Tape Stand alone purchase. Required for full vehicle wraps, especially around moulding and trim.
Felt Squeegee Replacement felt buffers. Stock 3 to 5 spare felts per active installer.
Wrap Squeegee Hard plastic squeegee for tight corners and panel edges.
Vinyl Wrapping Magnets Stock 12 to 24 magnets per active installer. They get lost, dropped, and overworked.
Window Tint Wrap Tool Kit Specialised kit for tint installs, rubber and stainless steel squeegees.
Vinyl Wrap Tool Kit Complete install kit, covers consumables and accessories beyond the main 8 tools.

Kit choice match up

  • Brand new wrap business, one or two installers. 13pcs/set Car Wrapping Tool Kit + a few replacement felts.
  • Established shop with 3+ installers. 21pcs/set Wrapping Tool Kit per installer + bulk consumables.
  • Window tint specialist only. Window Tint Wrap Tool Kit.
  • Adding wrap to a paint shop. 13pcs/set + knifeless tape + variable heat gun.

The Per Panel Time Math

Quick worked example, premium toolkit vs cheap toolkit on the same job.

Cheap toolkit, full vehicle wrap.

  • Hood, 45 minutes (drag, repositioning, blade resharpening)
  • Roof, 60 minutes (no magnets, single hand work)
  • Side panels x 4, 40 minutes each = 160 minutes
  • Bumpers x 2, 30 minutes each = 60 minutes
  • Trim and small panels, 90 minutes
  • Total install time, 415 minutes / 6.9 hours

Premium toolkit, same job.

  • Hood, 20 minutes (felt buffer glide, sharp blades, magnetic hold)
  • Roof, 30 minutes
  • Side panels x 4, 22 minutes each = 88 minutes
  • Bumpers x 2, 18 minutes each = 36 minutes
  • Trim and small panels, 50 minutes
  • Total install time, 224 minutes / 3.7 hours

The premium toolkit saves 3+ hours per full vehicle wrap. At $50 to $100 per installer hour, the toolkit pays for itself in 3 to 5 wraps.

How Each Customer Pain Maps to a Specific Tool

New installer building first toolkit. Complete 13 piece kit. → 13pcs/set Car Wrapping Tool Kit.

Established shop scaling, 3+ installers. One full kit per installer. → 21pcs/set Wrapping Tool Kit per installer + bulk consumables.

Drag marks and scratches on customer wraps. Replace cheap squeegees with premium felt buffers. → Felt Squeegee replacements, stock 3 to 5 per installer.

Slow trimming, blade keeps tearing vinyl. Snap off blade vinyl knife with regular blade replacement. → Premium vinyl knife with snap off blades.

Repositioning issues on vertical panels. Strong magnetic vinyl holders. → Vinyl Wrapping Magnets, stock 12 to 24 per installer.

Damaged paint from blade work. Knifeless tape for all body line cuts. → Knifeless Tape, stand alone purchase.

Frequently Asked Questions

How long does a premium felt buffer squeegee last?

50 to 100 installs before the felt wears smooth. Replace the felt buffer (not the whole squeegee) every 50 wraps. Felts cost $1 to $3 each.

Can I use a craft knife instead of a vinyl knife?

For occasional hobby work, yes. For professional shop work, no. Craft blades lose edge after 20 to 30 cuts and tear vinyl. Snap off vinyl knife blades stay sharp for 50+ cuts each and snap to a fresh segment instantly.

Are wrap magnets really better than just holding the vinyl?

Yes, dramatically. Magnets free both hands for squeegeeing, which is the single biggest time saver in vinyl wrap installation. Premium installers use 6 to 12 magnets per panel.

Do I need both a felt buffer squeegee and a hard plastic squeegee?

Yes. Felt buffer for flat panels (80% of install). Hard plastic for tight corners, recesses, and edges where the felt cannot reach (20% of install). Both are in the 13pcs/set kit.

What temperature should the heat gun be set to for vinyl install?

60 to 80°C for general stretch work. 80 to 100°C for chrome. 90°C for post heat to lock stretched vinyl. Variable temperature heat guns are mandatory because different jobs need different temperatures.

Why is the IR thermometer so important?

Vinyl stretches predictably only within a specific temperature range. Below 25°C panel temperature, vinyl resists stretch and rebounds (memory). Above 80°C, vinyl deforms. The IR thermometer tells you exactly where you are, no guessing.

Ready to Stop the Slow Install Days?

Browse the full Car Wrapping Tools range, complete kits, individual replacements, knifeless tape, magnets, squeegees, and accessories.

Free swatch of any wrap film with a tool kit order. WhatsApp +86-13626505244 or email dasonchan@tsautop.com.
Why Cheap Wrap Tools Cost 30 Minutes Per Panel workflow graphic
workflow image for car-wrapping-tools-installer-guide
Save-worthy checklist for car-wrapping-tools-installer-guide

Why Inkjet Vinyl Prints Bubble

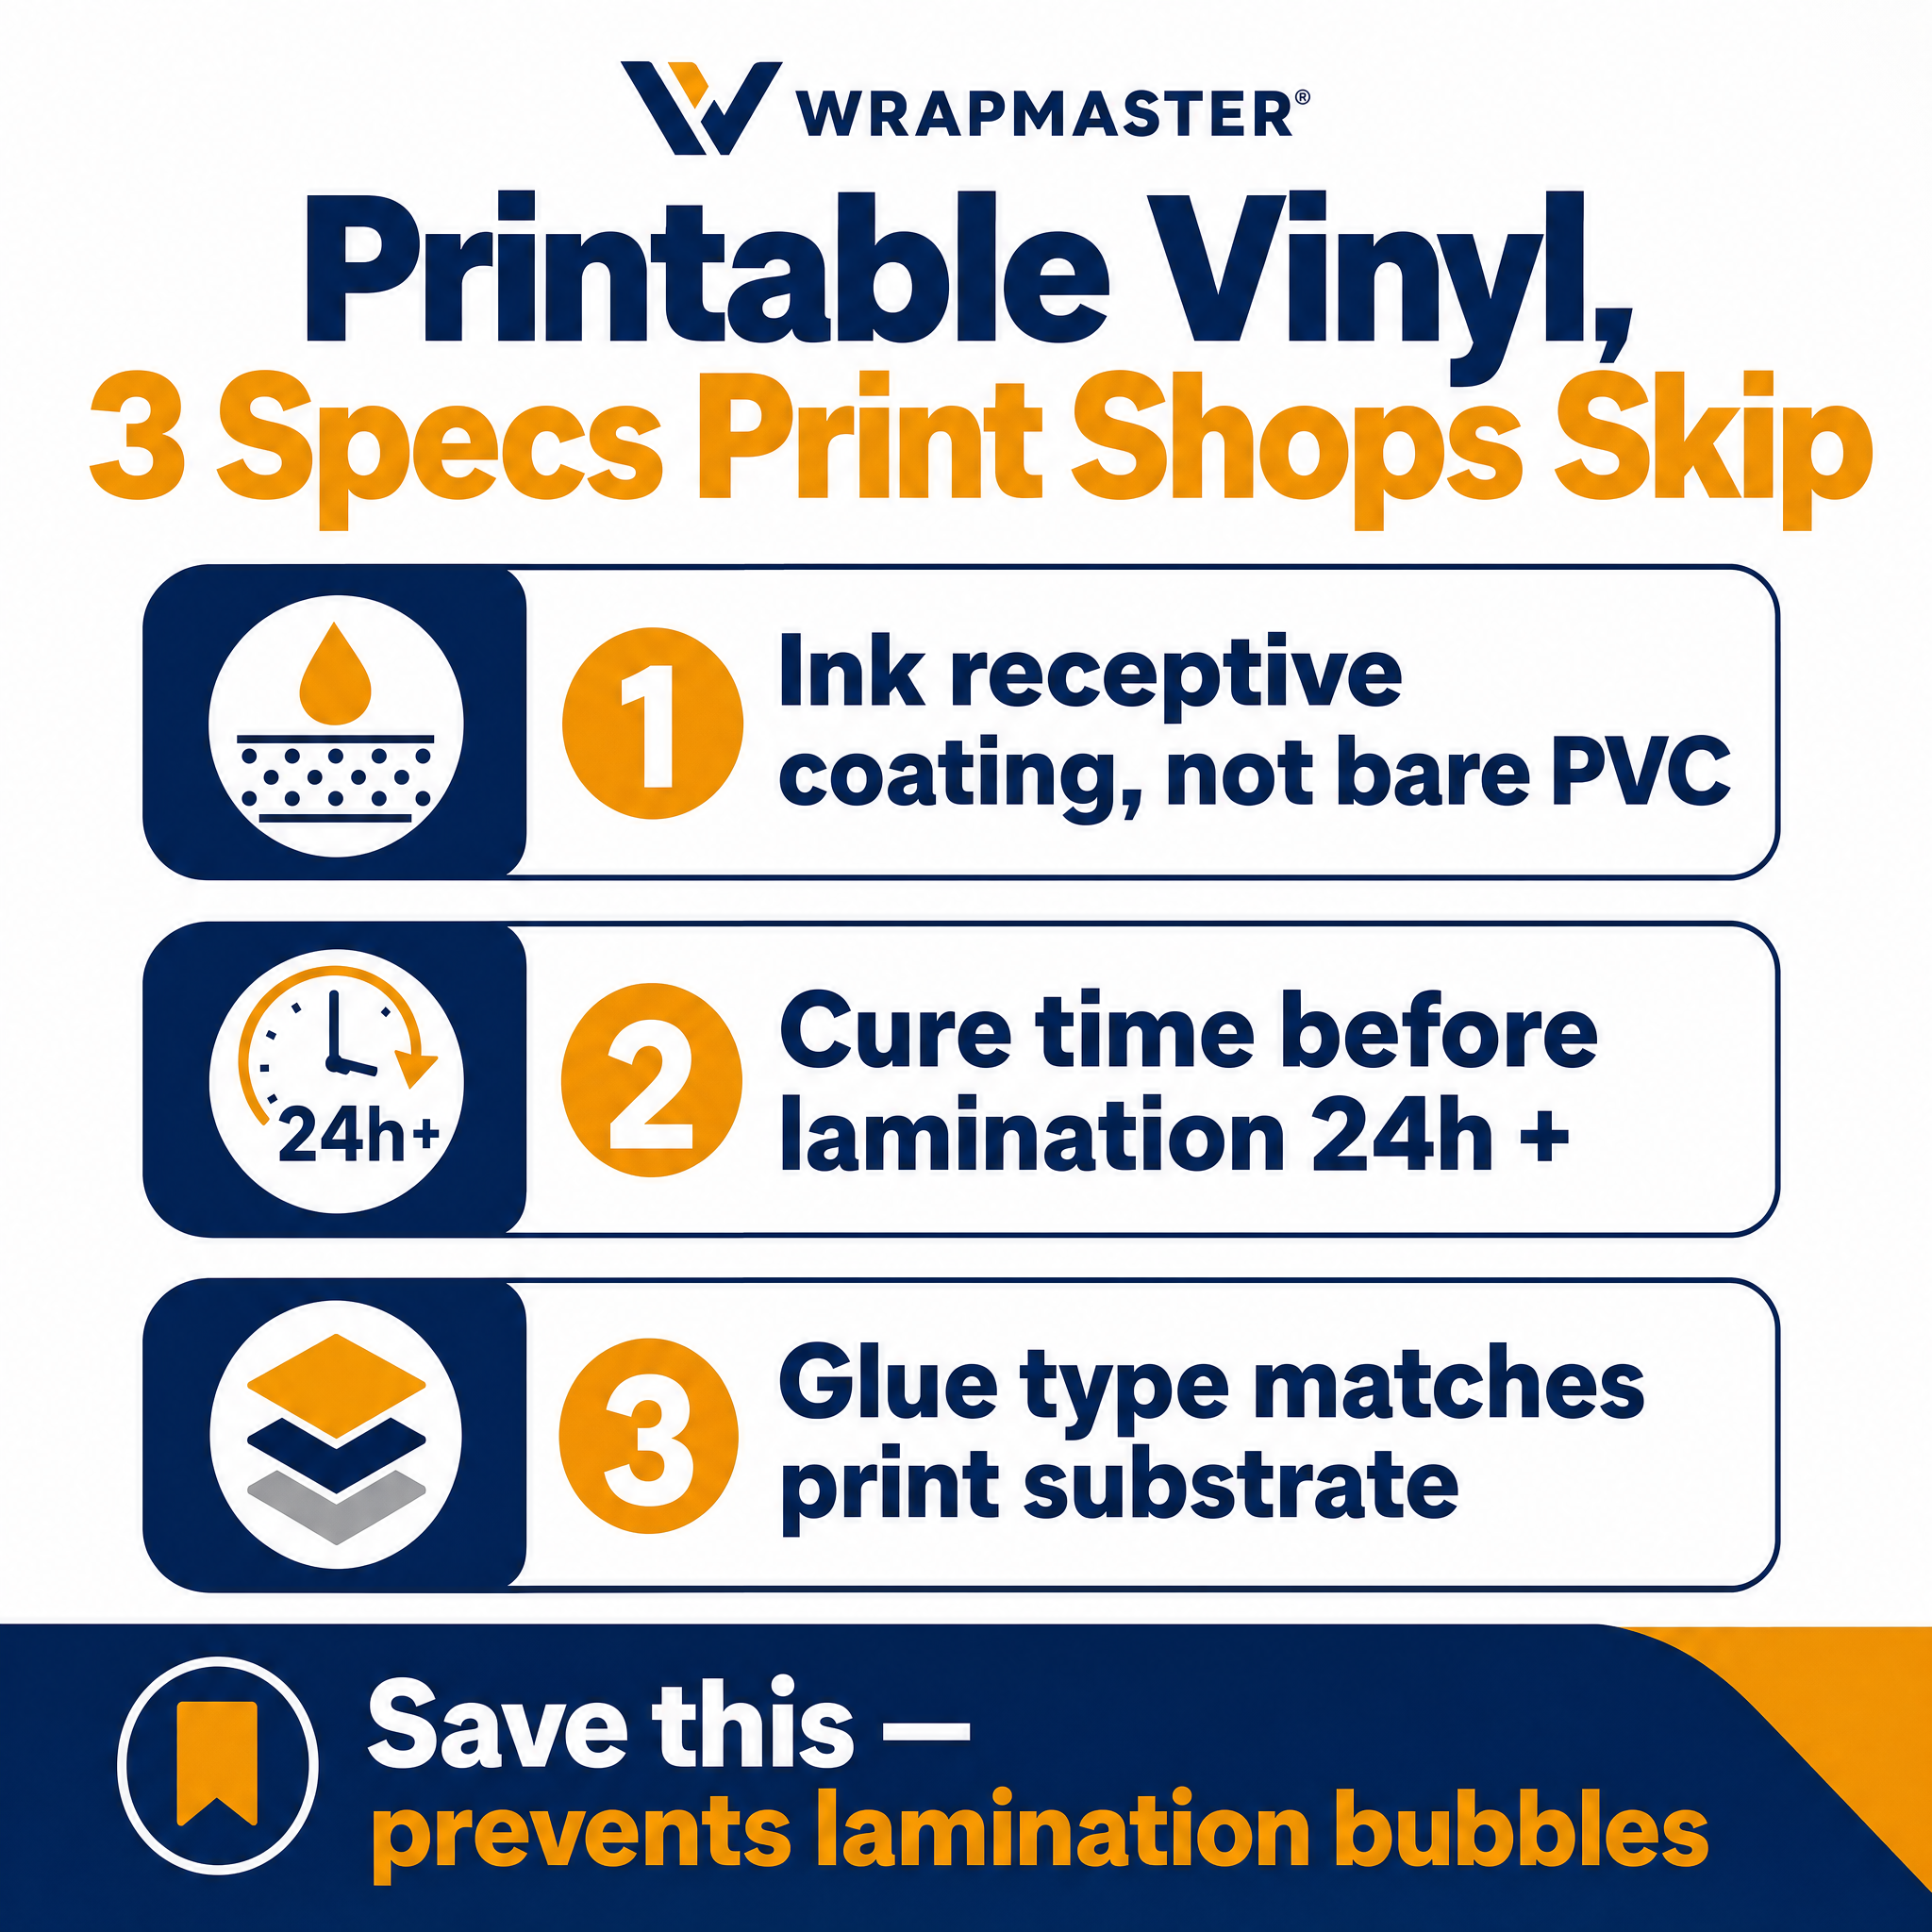
The short answer. Inkjet vinyl bubbles during lamination when the ink coating is still releasing solvent vapour, the adhesive backing is not suited to the substrate, or the lamination temperature is wrong. Three specs predict prints that laminate clean, one, ink receptive coating with proper outgassing time (24 to 48 hours), two, the right glue backing for the application (white glue for retail, black glue for blockout, grey glue for fleet trucks), three, printer type matched to the film (eco solvent, latex, or UV cure). Our Printable Vinyl range covers all three glue types for inkjet printers and UV printers.

Why Inkjet Vinyl Prints Bubble hero image

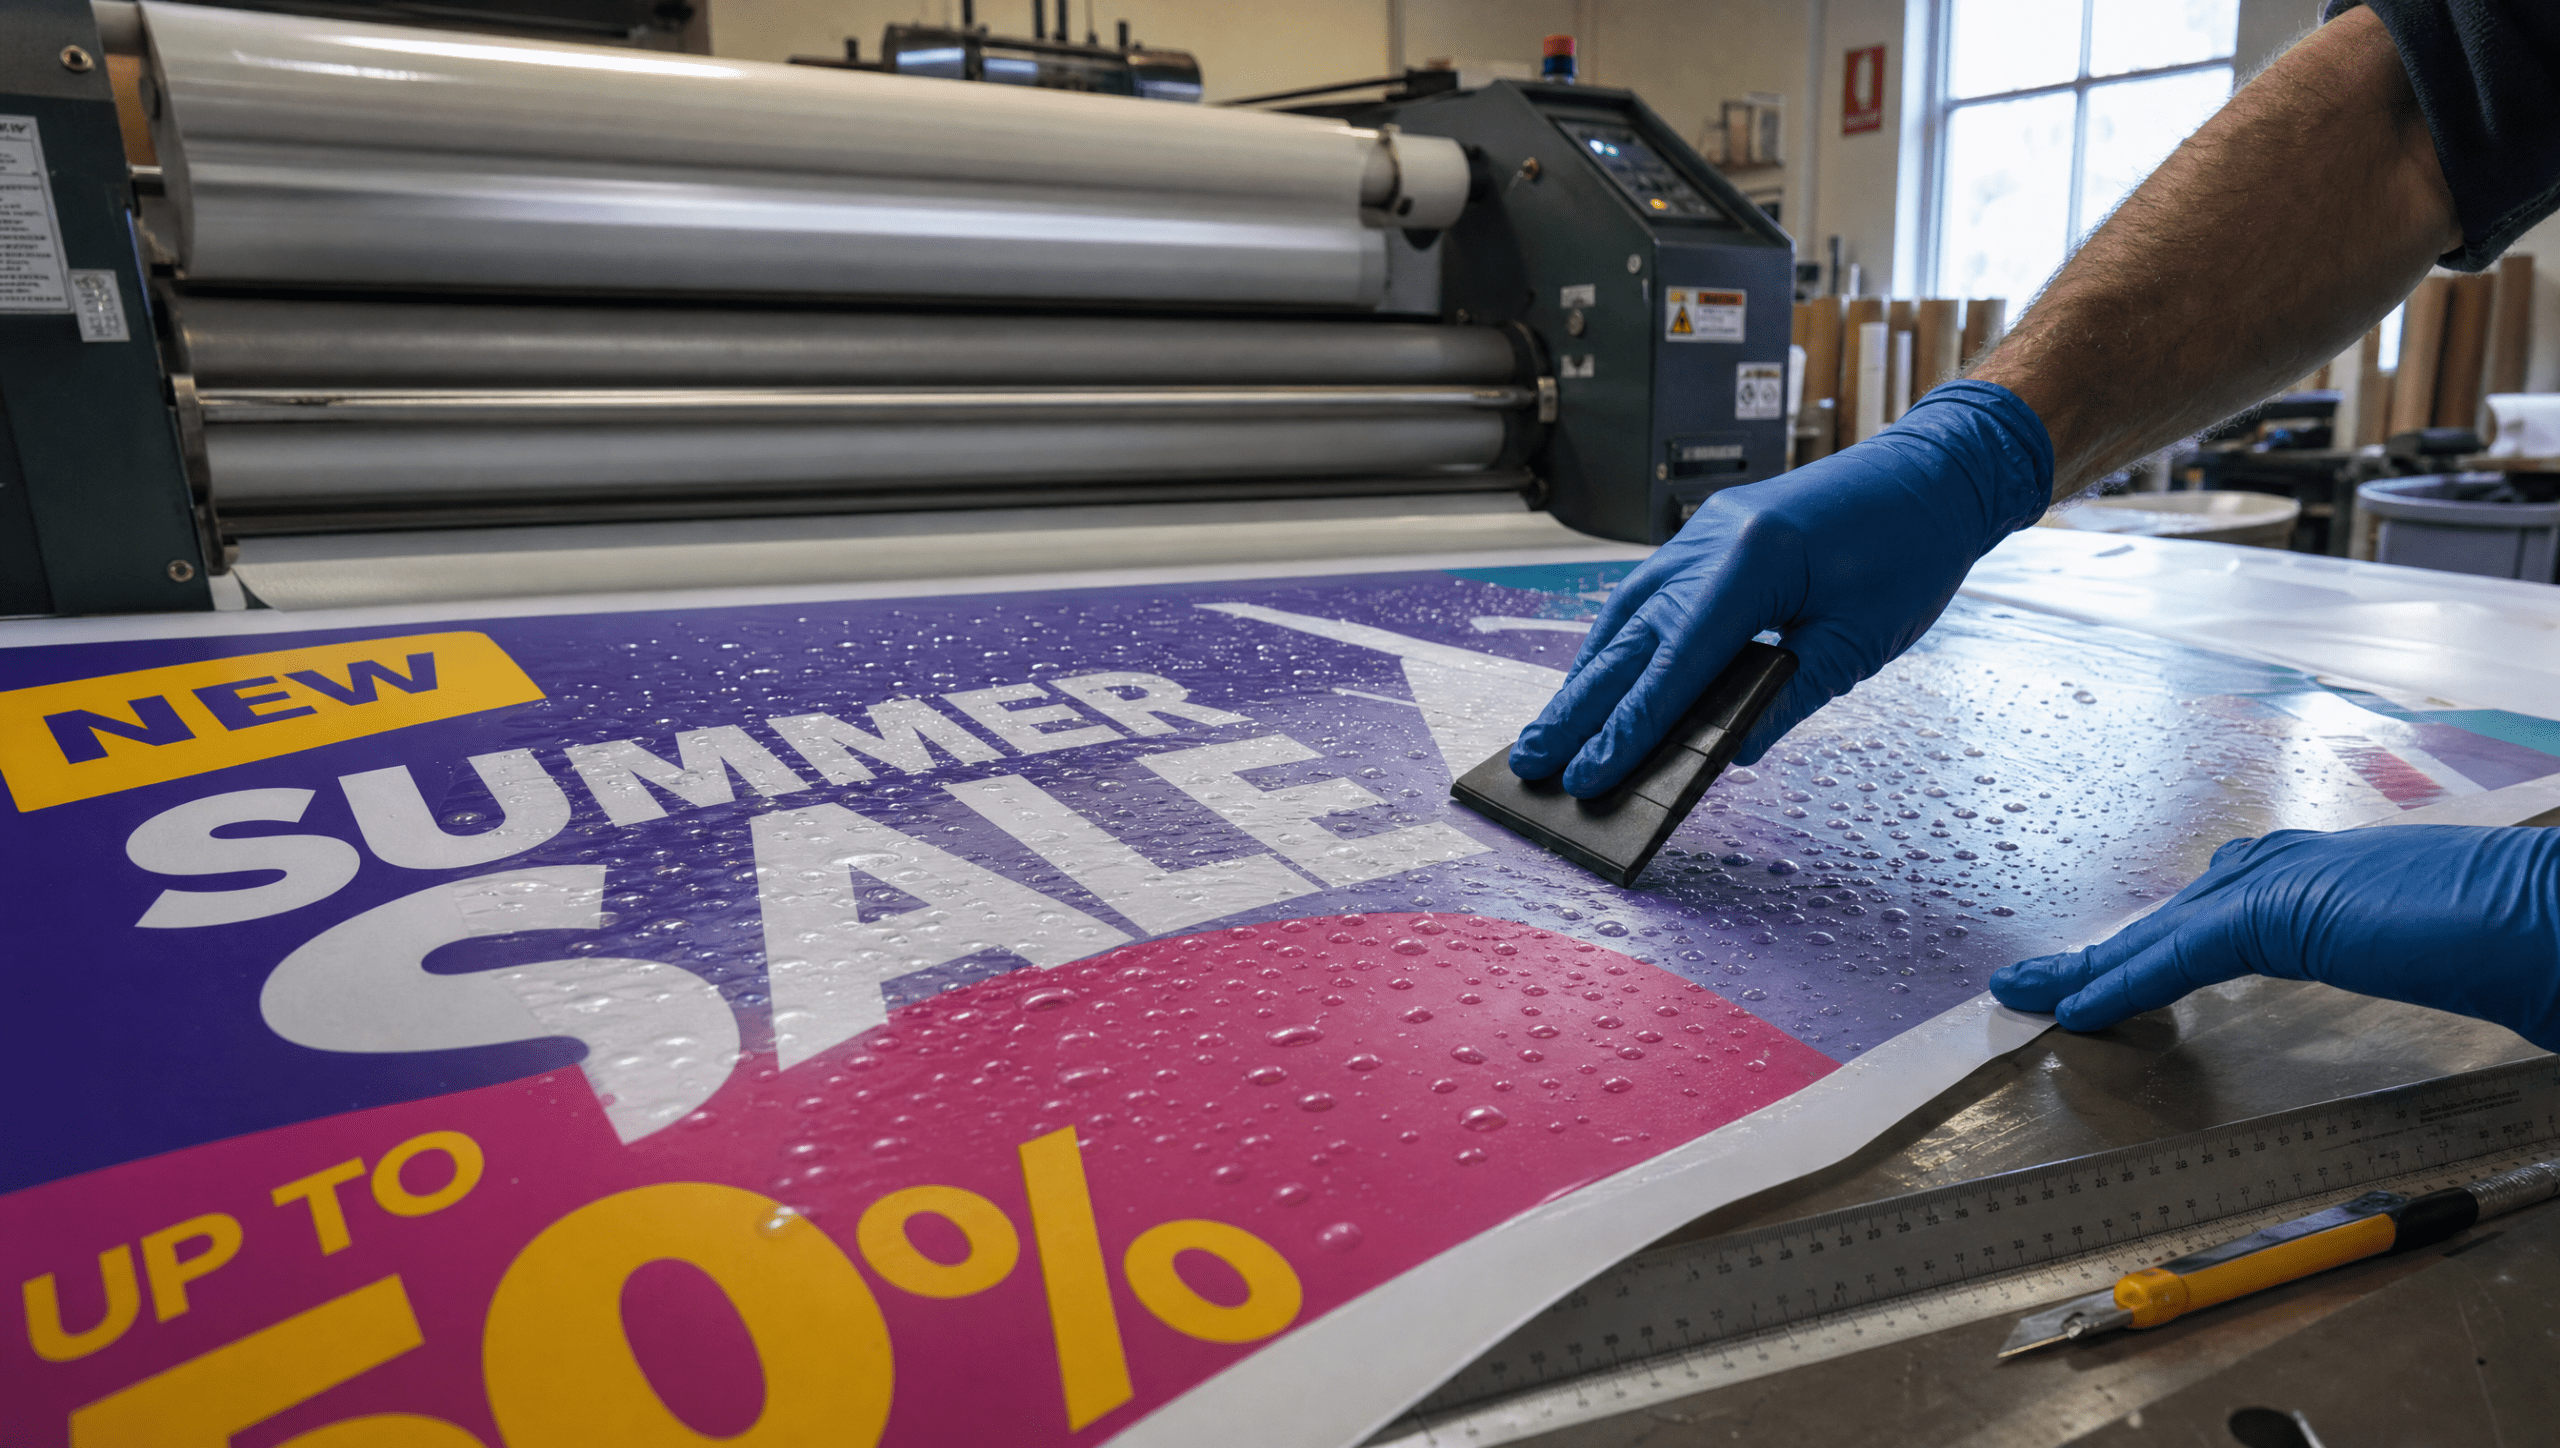
Your print shop just ran a 30 metre full bus side wrap. The print looked perfect off the printer. You laid the laminate over it. Halfway through the panel, bubbles started appearing. Now you have 30 metres of bubbled print sitting on the table and the customer wants it picked up tomorrow.

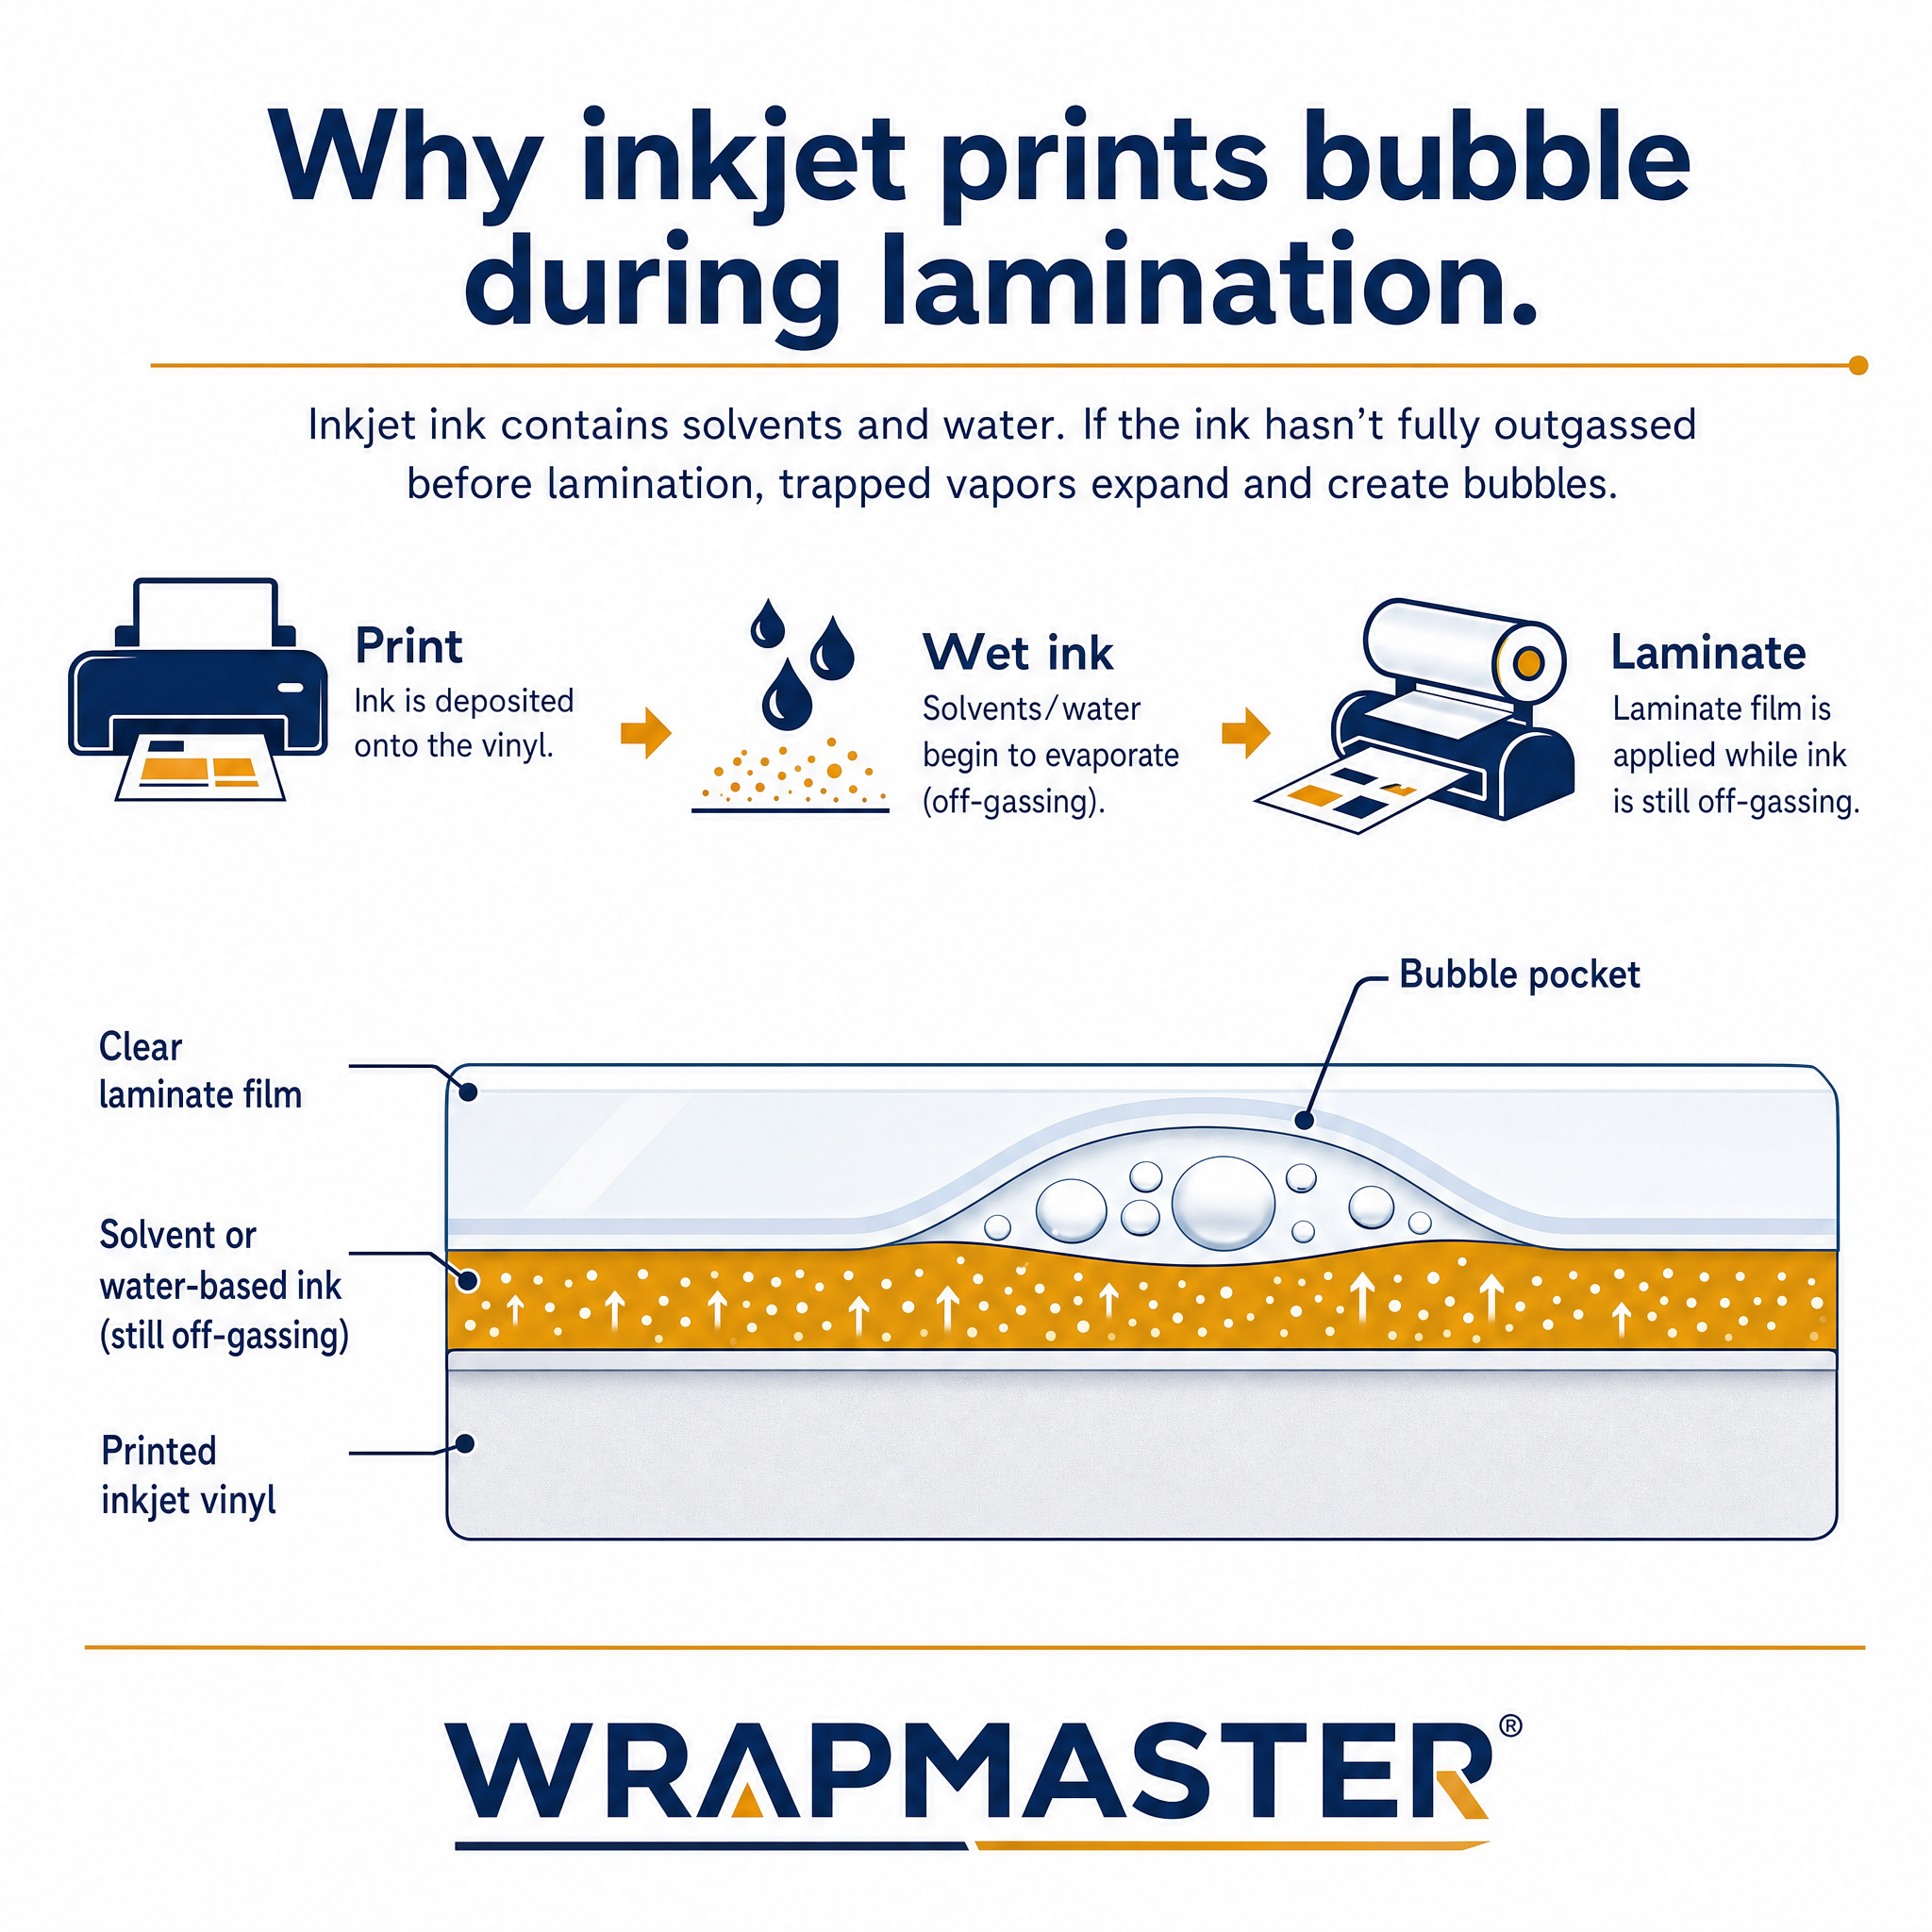
Lamination bubbles are not a printer problem and not a laminator problem. They are a chemistry timing problem. The ink is still releasing solvent vapour into the film, and when you trap it under laminate, the vapour has nowhere to go. The bubbles form, dry, and lock in place.

Three specs predict whether a printable vinyl will laminate clean, and they have nothing to do with the printer brand or the laminator brand. The rest of this article walks through them, and points to the right products in our Printable Vinyl range.

Why Inkjet Vinyl Bubbles During Lamination

Three causes. Each has a specific fix.

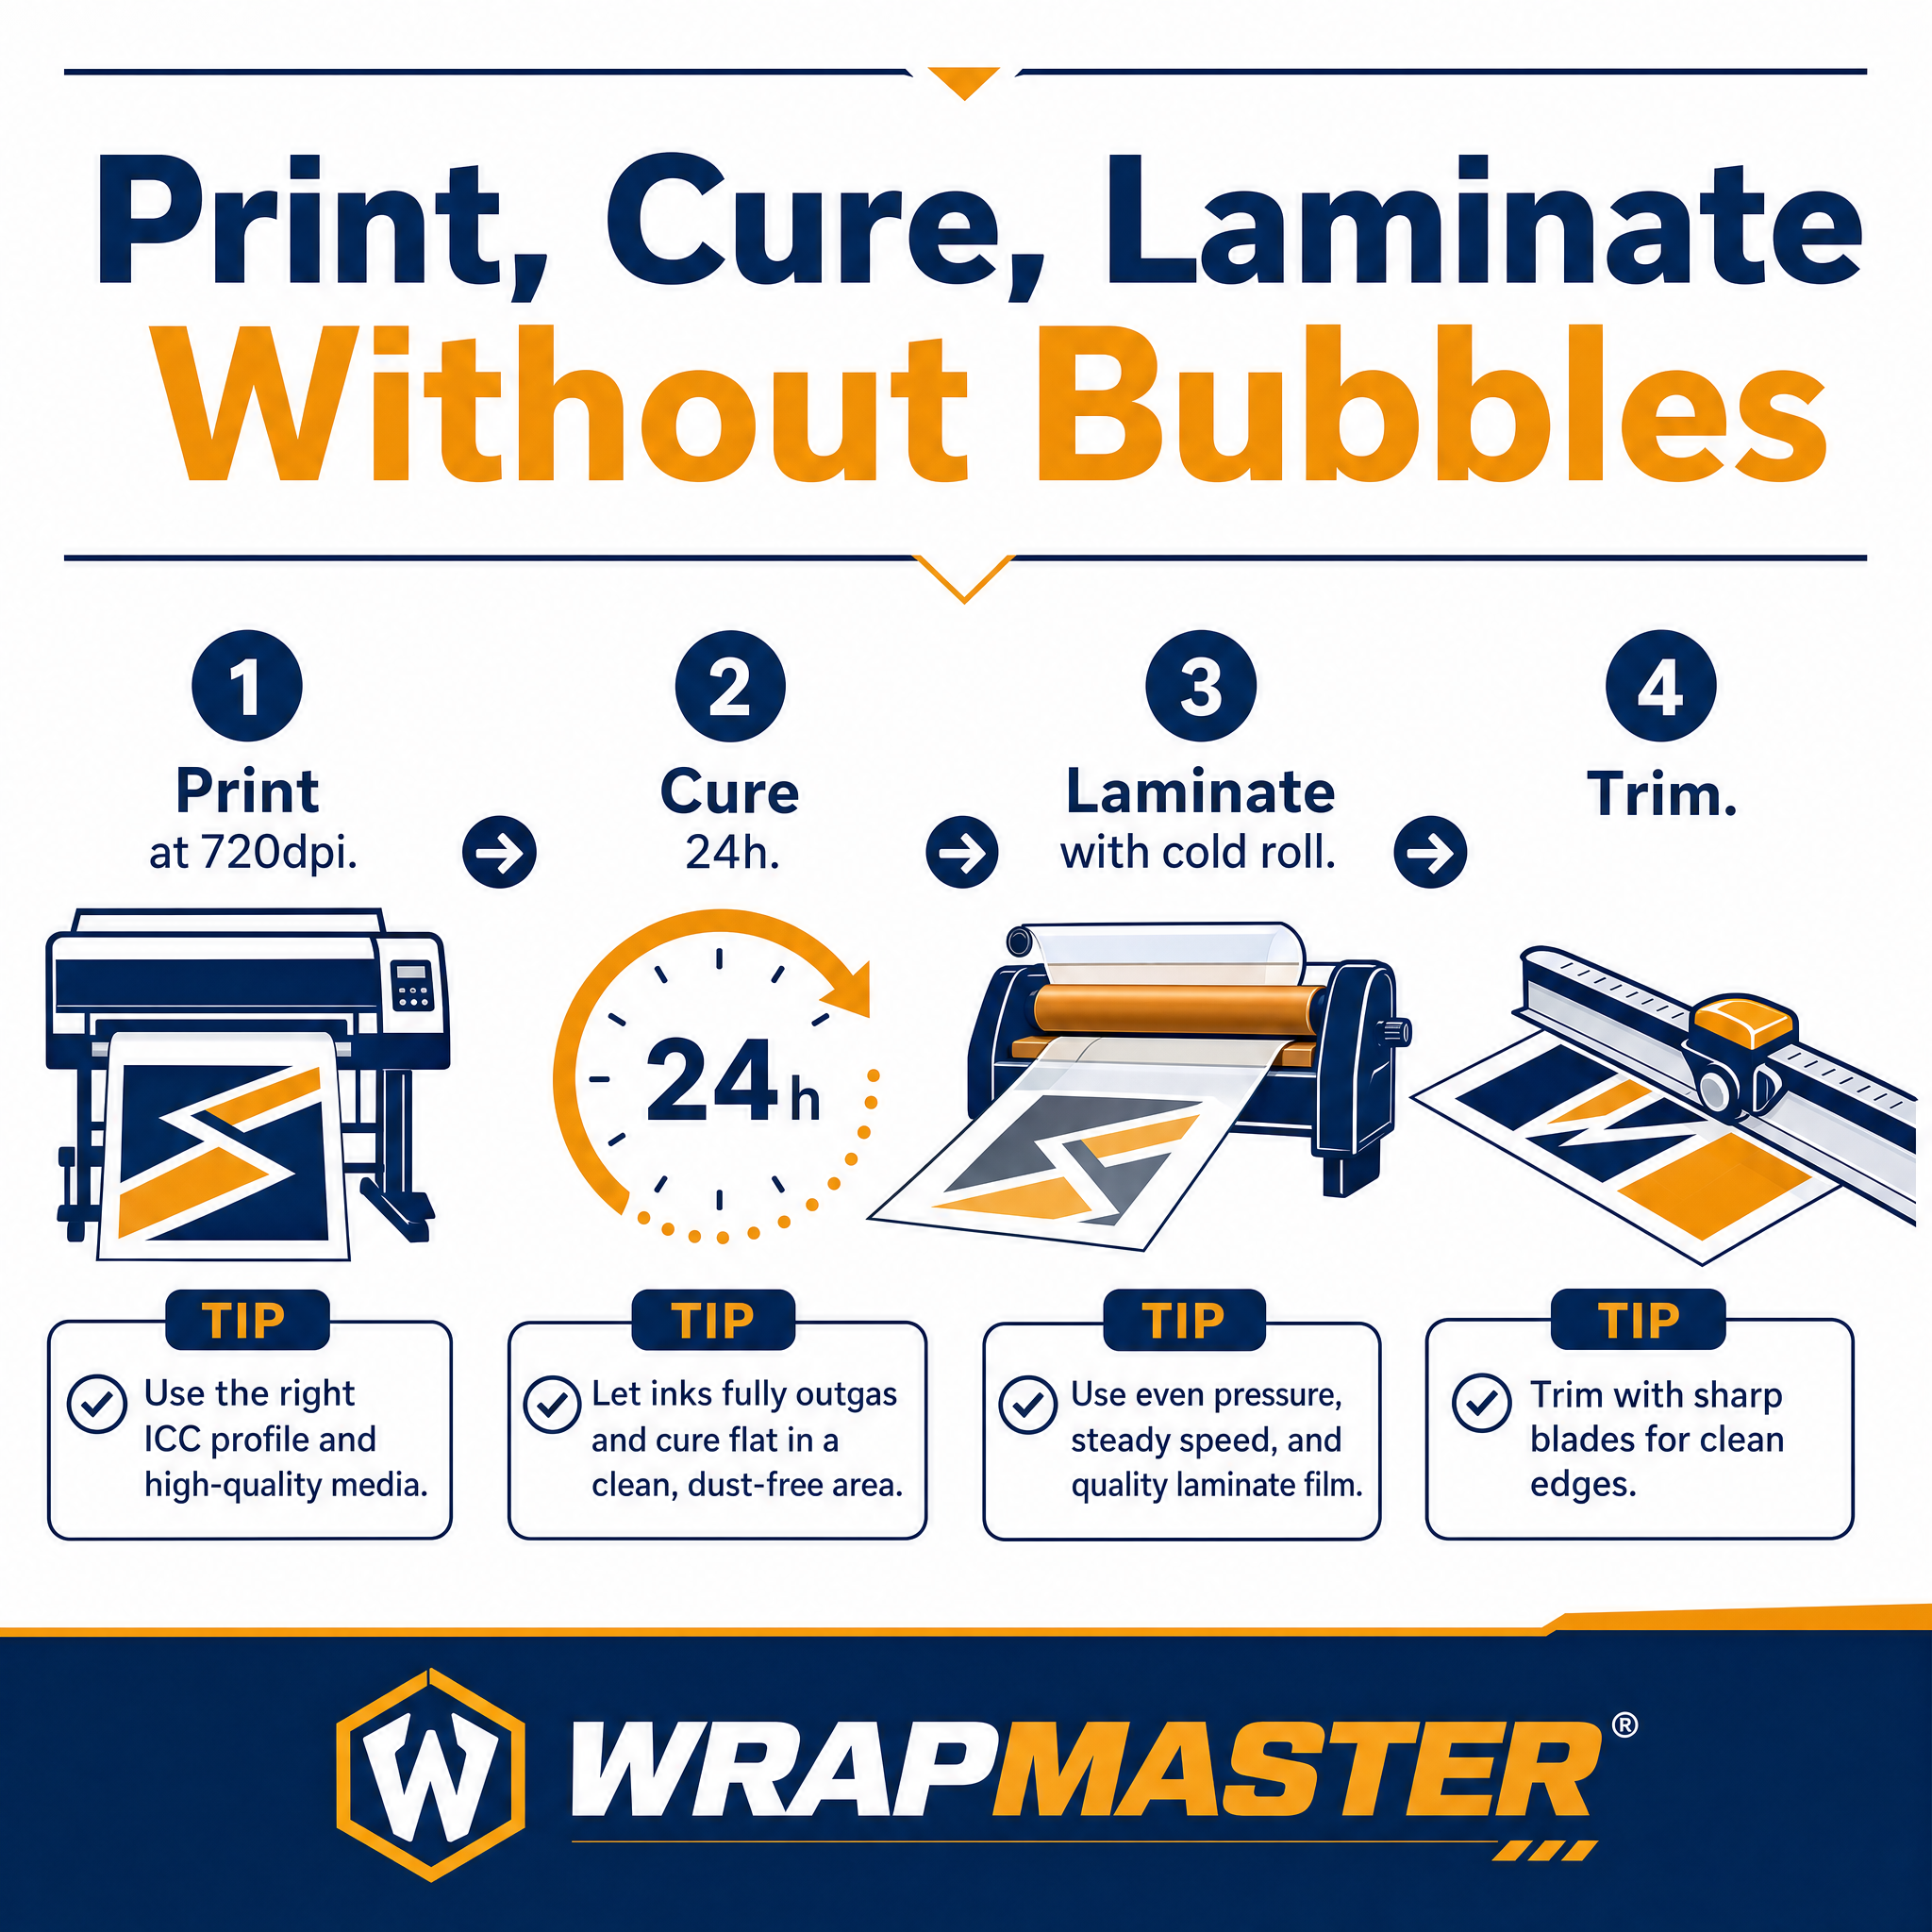
Outgassing trap. Eco solvent ink and latex ink both release vapour for 24 to 48 hours after printing. If you laminate too soon, the vapour escapes upward into the laminate film and forms bubbles. Fix, wait 24 to 48 hours after printing before laminating. Faster lamination is only safe with UV cure ink (no outgassing).

Wrong ink coating. Cheap printable vinyl uses a thin ink receptive coating that releases solvent unevenly. Premium printable vinyl uses a thicker engineered coating that releases vapour evenly and absorbs ink consistently. The cheap film bubbles even with 48 hour outgassing.

Adhesive backing mismatch. White glue, black glue, and grey glue are not just cosmetic. The colour relates to opacity and block out properties. Using grey glue when you need white glue (or vice versa) causes ghost images, see-through, or in extreme cases adhesive failure under heat.

The fix is not “wait longer.” The fix is selecting the right printable vinyl for the print conditions and lamination workflow.

Why Inkjet Vinyl Prints Bubble chemistry graphic

The 3 Specs That Predict Lamination Success

Spec 1, Ink Receptive Coating Quality (Eco Solvent, Latex, UV Compatible)

Premium printable vinyl publishes which inks the film is compatible with.

  • Eco solvent compatible only. Older film coating, works with Roland, Mimaki, Mutoh eco solvent printers. Does not always work with latex or UV.
  • Eco solvent + latex compatible. Standard premium coating. Most printers covered.
  • Eco solvent + latex + UV compatible. Top tier coating, accepts all three ink types. Required for shops running multiple printer types.

If a printable vinyl spec sheet does not list compatible ink types, the coating is probably eco solvent only and may bubble with latex or UV ink.

Spec 2, Adhesive Backing (White, Black, or Grey Glue)

The colour of the adhesive backing determines two things, the opacity / block out of the print, and the visual through the film if it lifts.

White glue printable vinyl. Used for retail window decals, light coloured backgrounds, posters that want a bright clean print look. The white adhesive prevents the substrate colour from showing through. Most common in the WRAPMASTER Printable Vinyl range for bus advertising.

Black glue inkjet printable vinyl. Used for blockout applications, dark backgrounds, signs that go on coloured or dirty substrates. The black adhesive prevents any colour transmission through the film. Essential for billboard installs and dark vehicle wraps.

Grey glue printable vinyl. Used specifically for commercial truck wraps and fleet vehicle applications. Grey adhesive blocks out the vehicle paint colour without affecting the printed colour. Compromise between white (cleaner colour) and black (full blockout).

Spec 3, Lamination Compatibility (Cold Laminate vs Heat Laminate)

Different printable films are engineered for different laminator types.

  • Cold pressure laminate compatible. Most flexible, can be laminated at room temperature with low pressure. Required for thin film and short outgassing times.
  • Heat laminate compatible (60 to 80°C). Stronger bond between print and laminate. Used for outdoor signs and vehicle wraps. Requires film that can survive the heat without deforming.
  • Both. Premium printable vinyl accepts both methods. Gives the print shop flexibility.

Which Printable Vinyl In Our Range For Which Print Job

Our Printable Vinyl category carries three glue backings, each tuned to a specific application. All three are compatible with eco solvent ink and UV ink. Roll widths from 1.07m to 1.52m, lengths 50m standard.

Product Glue type Best for
White Glue Printable Vinyl White adhesive Bus advertising, retail window posters, light background prints, high clarity colour reproduction
Black Glue Inkjet Printable Vinyl Black adhesive Billboards, dark substrates, blockout applications, dark vehicle wraps
Grey Glue Printable Vinyl Grey adhesive Commercial truck wraps, fleet vehicles, balanced blockout without colour shift

Application match up

  • Bus side advertising. White glue. Bright print, clean colour.
  • Truck and van fleet wraps. Grey glue. Hides the vehicle paint underneath without affecting print colour.
  • Billboard production. Black glue. Full blockout, no light bleed through.
  • Vehicle hood prints on dark cars. Black glue. Prevents the paint colour from muting the print.
  • Window cling decals on glass. White glue. Clean appearance from both sides.
  • Wall murals indoors. White glue, cold laminate compatible film.

How to Print and Laminate Without Bubbling (Workflow)

Three rules for a clean lamination every time.

One, outgassing time per ink type.

  • UV cure ink, laminate immediately if needed. No outgassing required.
  • Latex ink, outgas 4 to 8 hours minimum.
  • Eco solvent ink, outgas 24 to 48 hours minimum. Longer in humid climates.

Two, lamination environment. Aim for 18 to 25°C ambient temperature and 40 to 60% relative humidity. Cold rooms slow the adhesive cure. Hot rooms speed it too much. High humidity traps moisture.

Three, lamination speed and pressure. Cold laminate at 0.5 to 1 m/min, even pressure. Heat laminate at 60 to 80°C, 1 to 2 m/min, even pressure. Too fast traps air. Too slow over heats the film.

How Each Customer Pain Maps to a Specific Product

Print shop running eco solvent on a Roland, bus ad clients. White glue, eco solvent compatible. → White Glue Printable Vinyl.

Sign shop doing dark vehicle wraps. Black glue for blockout. → Black Glue Inkjet Printable Vinyl.

Fleet wrap business doing trucks and vans. Grey glue, balanced blockout. → Grey Glue Printable Vinyl. Volume default for commercial fleet print work.

Multi printer shop with eco solvent and UV printers. Premium coating compatible with both. → Full Printable Vinyl range, specify multi ink compatibility on the order.

Print shop scaling and needs catalogue for buyer reference. Download the full Printable Vinyl catalogue from the contact form.

Frequently Asked Questions

How long do I need to outgas eco solvent prints before laminating?

24 to 48 hours minimum. Outgassing time increases in humid climates. UV cure ink does not require outgassing because it cures fully during printing.

Why is the adhesive backing colour important on printable vinyl?

The colour determines opacity through the film. White glue prevents substrate colour from showing through, black glue provides full blockout for billboards, grey glue is the standard for fleet trucks where you want to hide vehicle paint without affecting print colours.

Can I laminate printable vinyl with cold pressure or do I need heat?

Both work depending on the film grade. Cold laminate is faster and safer for thin film. Heat laminate creates a stronger bond for outdoor signs and vehicle wraps. WRAPMASTER printable vinyl accepts both methods.

What roll sizes does WRAPMASTER printable vinyl come in?

Standard widths 1.07m to 1.52m, length 50m. Custom widths and lengths available for bulk orders.

Is WRAPMASTER printable vinyl compatible with my printer?

The range is compatible with eco solvent ink (Roland, Mimaki, Mutoh) and UV cure ink. Latex compatibility on specific products, confirm with the spec sheet before ordering. Request a swatch sample to test on your specific printer.

Can I use the same printable vinyl indoor and outdoor?

Yes for standard SKUs, but the outdoor lifespan depends on the laminate film over it. Use a UV stabilised outdoor laminate for any sign exposed to sun.

Ready to Stop the Lamination Bubble Callbacks?

Browse the full Printable Vinyl range, three glue backings, eco solvent and UV compatible, custom widths and lengths.

Free swatch sample to test on your printer. WhatsApp +86-13626505244 or email dasonchan@tsautop.com. Spec sheet with ink compatibility, outgassing recommendations, and lamination guidelines on request.

Why Inkjet Vinyl Prints Bubble workflow graphic
Save-worthy checklist for why-inkjet-vinyl-prints-bubble